How to create a presentation on a computer. How to make a presentation on a computer: step by step instructions with screenshots
Our age is the age of computer technology, a time when everything goes digital and is created on a computer. Today, at various events, it is no longer enough just to talk about your idea, you need to present it as best as possible. Presentations made on the computer began to open up new possibilities, for which they gained their immense popularity. Today, we will teach you how to create interesting presentation in Powerpoint (included in the office suite Microsoft Office).
1. In order not to lose the attention of the audience, try to make the presentation not very large.
2. Choose the right size, color and font that will be visible and understandable to everyone.
3. Use no more than 25 words per slide.
4. The background of the slides should not merge with the color of the text.
5. Check spelling.
Instruction. How to make a presentation in powerpoint?
Step #1. Properly prepare the information that you want to present through the presentation. Do not forget that this is an addition to your report, not a replacement.
Step #2. We start the program.
Step #3. To create a presentation, click: “File → New → New presentation».

Step number 4. You can decorate your presentation using the Design → Themes function. Among the proposed topics, you can choose the most suitable for the topic of your presentation.

Step number 5. All entered information can be edited by changing the font, color and size of the text.

Step number 6. You can also place the information you need in the form of graphs, diagrams, tables, pictures and other things.
Using the Insert tab.

Step number 7. How to make a presentation with music? As well as graphic files, you can also add music by setting all the playback settings. In the Insert tab, click Media Clips, then Sound. After that, a dialog box pops up, through which we select the audio file you need.

Step number 8. Each inscription or picture can be embellished a little by adding an animation effect. Animation tab, after selecting any element.

Step number 9. We make switching slides more beautiful, use the "Transition to the next slide" function in the "Animation" tab. The program offers more than a dozen transitions, the choice is yours!
In our age of rapidly developing information technologies it’s not enough just to listen to some new idea or program. Listeners also want to see for themselves the quality and benefits of the products offered by the narrator. Overview photos, well-designed diagrams, drawings, informative videos should be used here. Therefore, creating a presentation on a computer today is an important accompanying element of every storyteller, and sometimes even a teacher.
In what areas are such ideas applicable?
For example, this is marketing, economics, or even design. I believe that such a process is the key to success, unfolding before the eyes of those watching your abilities in creativity, all kinds of paths to further growth.
Powerful Microsoft Tool Office PowerPoint entered the structure of Microsoft Office. It is both simple and strong, high-quality designer of excellent presentations. Using this program, you can create a productive performance. In what ways can information be presented? This is a report, an exhibition, and even a demonstration. According to their structure, they are divided into simple or schematic, accommodating all kinds of graphics, illustrations, special effects.
Action plan for creating presentations
So let's start:
First things first, let's define the concept. To do this, we mentally answer the questions: the purpose of our speech, who is our audience, the content and duration of the story.
Start
We start the program. We find "Create a slide" at the top right, select the layout there. It may be different for each time.

Sample
When compiling a presentation, this program automatically contains a template. To execute a new one, you need to click "Office", then select "Create". A window will appear in which you need to find “Empty and Recent” in “Templates”, open “New Presentation”.


And the templates are selected through the "Microsoft Office" option. There are "Widescreen Presentation", "Modern Photo Album", "Classic Photo Album", "Advertising Booklet", "Quiz".
Topic
The “Themes” group in the “Design” tab will help bring a touch of originality to your work. The necessary images in the corresponding tab will allow you to change appearance them. You just need to click on "Apply to selected slides."


All the topics present in the program are suitable for any kind of presentation. The color scheme is changed through "Effects", "Colors", "Background Styles". By the way, for display in Microsoft PowerPoint it is possible to make a theme yourself. For this, personal drawings and photos are used.
Font
You have a good opportunity to vary the color, size and type of the font. Actions for the selection thereof are built by analogy with Microsoft Office Word.


To write, you need to place the cursor in the "Header", then in the "Home" tab, go to "Font". Here you will find a suitable font in all respects.
Not many people know that all information can be divided into basic and additional. The main one must be highlighted, then during the show it will be she who will demonstrate the main idea. And we use a side one to emphasize the main idea. I recommend using 22-28 font for the title, 20-24 for subheadings, write the text itself and the data in the tables in 18-22 size. And one more interesting fact- "principle of six": the best perception of information gives 6 words per line, and 6 lines per slide. I think the most understandable fonts are Times New Roman, Verdana, Arial, Bookman Old Style, Calibri or Tahoma.
Illustrations
Graphs, drawings and photographs are used to give the presentation clarity and expressiveness. Go to "Illustrations" in the "Insert" tab. Finding the right group.


I don't think you should resort to a "picture wrapped in text". The illustration will look clearer if placed on a separate slide.
Music in presentation
You probably didn't even suspect, but PowerPoint can be provided with music. To use it in your presentation, you need to select "Sound" in the "Media Clips" group (this is the "Insert" tab). A list of commands will appear, select "Sound from file" from it. A dialog box should pop up in which you need to select a folder for picking up music, as well as an audio file. The next step is to decide on the sound option: it can be automatic or on click. In "Working with sound" we will need the "Sound Options" group, where we will set the necessary options.

Animation
Your presentation will become much more interesting if you use animation in it. There is a tab with the same name with the group of the same name, by going to which you need to open "Animation settings". We click on the required object, or on the text. In the "Animation Settings" click "Add Effect", after which we perform actions using effects. They will appear in the Animation Setup list as you add them. And the start of the animation and its speed are set in the "Changing the effect" section.

Keep in mind that you don't need to overload your performance with special effects. In order not to overstrain your audience and keep their attention on the main idea. Therefore, animation will be useful only in small quantities and if it carries some kind of semantic load.
Transitions
An important component of a good presentation is transitions. If the user wants to set the same transitions, in the "Animation" tab, click on the slide icon, and then in the "Transition to the next slide" select the desired change effect.
To set the tempo for changing one slide to another, in the “Transition to the next slide” open the “Transition speed”, then determine the required tempo. In the "Slide Change" select the type of transition: in automatic mode or on click. But that's not all - the change can be accompanied by sound. In Transition to Next Slide, it's the Transition Sound button. If you need some sound that you do not see in the list, you need to use the "Other sound". And I recommend making 2 copies of your speech, in which you mark the transition points. The first copy is for myself, the second is for the technician who will assist you during the show.
The final
Well, here's the finale! Now let's enjoy our work. To view, click "Slide Show" in the right corner, at the bottom. Seeing that something went wrong, you can always return to any frame with "Esc" and correct. Then save the corrected version of the work.
To the entry "How to create a presentation on a computer" 12 comments
Sergey, thank you very much for the article, it is very useful to me now, I am doing a fire alarm project for a trolleybus depot.
Yuri, thanks. Good luck with your presentation.
Thanks for the helpful post. Actually, I'm not going to make a presentation right now. But I will know where to run in the future. To your site. Here's another example of such a presentation)))
An interesting description of the program is presented in an accessible way, and at the end there is also a link to a free program, I was so happy, but I had to rejoice for a short time, it turns out that this is only a trial version. Although I intended to use it from time to time, but this option is not suitable. "Free" for this program is also not suitable.
Peter, thanks for your comment. The fact is that earlier a free version of the program and office 2007 was provided at this link. Apparently, Microsoft has already removed it. It's a pity. I will also delete the link so as not to reassure anyone.
After automatic skype update, the window "not enough memory to complete the operation" began to appear and the computer starts to slow down. After removing Skype, everything is restored, but after installing another Skype, everything repeats again. Scanned the computer using DrWeb, treated CureI, cleaned Tune up. Reg Organizer. CCLener. AusLogics - nothing helps. Please tell me what else can be done besides reinstalling the system.
Does this happen only with Skype or with other analogue programs too?
only with skype
Thanks. Installed, it works. But at first I was embarrassed by the lack of video, although the webcam turned on (the indicator turned on) and before that it worked. I installed another camera - the video appeared. And the previous one works in a strange way - there is no video until you pass your hand in close proximity to the camera. Then everything works until shutdown. Thanks again.
If everything is ok, maybe a new version somehow "eats" the memory. Here it is necessary to understand on the spot for what reasons. Igor, next time you leave questions or or in the appropriate topic. otherwise people read “How to create a presentation on a computer”, and comments are about something else :)
Thanks for understanding!
Leave your comment
For some, the question of which program to make a presentation in is not relevant: they have already chosen the software and are successfully working on creating their products. However, it is known that most users choose one or another program simply out of habit. They say it's just more convenient for them.
We won't mind. But since you dear reader, got to this page, so you are interested in the question posed in the title. As part of this post, I would like to conduct a little research on which program is more convenient to use, depending on the purpose of creating a presentation.
Determine the purpose of the presentation
At this stage, we need to answer the question for ourselves: why do I need a presentation at all. What do I want to achieve with it. In this regard, there are several categories of purposes for creating a presentation:
- Photo slideshow. These kinds of products are created to inform the audience, maybe to store family history. Slide shows are sometimes used to present a report of an enterprise. Usually accompanied by music or narration. (see Option 3).
- Presentation of the project (business presentation). In this case, the presentation is designed to reflect the professionalism of the author, to maximize the benefits of the presented project, to be strict and informative.
- Defense of academic or scientific research. It looks like a business presentation. There may be differences in script and content.
- Video presentation. An analogue of a slide show, but it uses not only photos, but also other types of multimedia: text, audio, video. Drawn presentations have become one of the varieties of video presentations.
- Diagram slides to accompany the teacher's or tutor's explanation. The purpose here is illustrative. The slide in this case should be understood as an additional didactic material that allows you to use visual perception in the process of studying the material. Such a slide may sometimes contain not only useful information, but also something that particularly attracts attention, so that the listener and viewer more clearly perceive what is being explained to him and remember it better.
- Interactive presentations for organizing testing or training testing of students' knowledge.
Choosing a Presentation Technology
Depending on the purpose of creating a presentation, you need to choose a technology. What will the presentation be like?
- Easily change slides with a mouse click or keyboard button press. Good for educational, business presentation. This view is also useful for creating a video presentation based on a regular one.
- Automatic slide change. Used for slide shows. In this case, no human intervention is required. All you need is spectators.
- The presence or absence of sound accompaniment. For presentations for educational purposes, business presentations do not need sound. It will only distract, introduce an element of entertainment, which is unacceptable for serious meetings.
- Interactive presentation. The most difficult, in terms of creation, technology. Not always needed. This method creates training programs or programs for use on interactive whiteboard when it's more convenient to use the screen to move between slides.
Now we decide in which program to make a presentation
There are several programs in which you can successfully create presentations. Each of them has its advantages, but there are also disadvantages. For now, we will not consider online methods for creating presentations, but will examine only two competing PowerPoint programs - the Microsoft Office suite application and Impress, which is part of Open Office or Libre Office.
In a nutshell. Microsoft Office paid product, and Libre Office is free. Impress, part of Open office, has the ability to import a presentation in pdf format, and PowerPoint before version 2013 did not have such an opportunity. Finally, add-ons from auxiliary programs designed, for example, to capture video from a computer screen, are integrated into PowerPoint and not integrated into Impress.
Although none of the advantages listed here, in our opinion, is fundamental. You can convert files to pdf with third-party programs, including online. You can capture video from the screen on which the Impress presentation is shown in the usual way, as for any other program. But, in the course of using a particular program, a person gets used to having certain tools in a certain place, so he does not feel like switching to another software.
Drawing presentations can be created in the VideoScribe program, which is distributed only for a fee and has a seven-day demo period.
Scheme for creating a quality presentation
After we have decided in which program to make the presentation, we have formulated the purpose of the presentation, we write the script. Yes, yes, just like a normal movie. In the script, it is important to note what will be on the slide, how it is placed, what kind of soundtrack will be used. If you decide to create a video presentation, you will also need to decide on the time of the slide show.
When the scenario is created, we proceed to its implementation in the selected program. This is the most labor intensive process. It is important to select high-quality images, concisely compose text messages on the slide. It is also worth paying attention to keeping the style of the presentation the same on all slides.
Only a high-quality presentation will produce the effect that we set as our goal. In this blog, I want to devote to the creation of an effective presentation that solves the goal. Sign up for updates to find out in time when a free training course on how to make an impactful presentation is available.
Dear readers, I would like to ask how you decided for yourself the question “in which program to make a presentation?” Share with us your thoughts. Maybe some nuances do not allow using this or that software for certain purposes. Write in the comments, let's discuss.
Any amount can be specified.
PowerPoint 2010 is a program for working with presentations, which allows you to create presentations with dynamic slides. Slides can contain animation, text, pictures, videos, and more. In this lesson, you will learn how to work in the PowerPoint 2010 environment, in particular, how to get acquainted with the new pop-up menu.
You'll learn how to use and modify the Ribbon and Quick Access Toolbar, as well as how to create a new presentation and open an existing one. After this tutorial, you will be ready to work on your first presentation.
Introduction to PowerPoint 2010
If you're familiar with PowerPoint 2007, you'll notice that the 2010 interface is slightly different. The main difference is the appearance of a pop-up menu, which we will talk about in this tutorial.
PowerPoint uses slides to create presentations. To create compelling presentations, PowerPoint lets you add text, bulleted lists, pictures, graphics, videos, and more to your slides. The number of slides in a presentation is not limited. And you can watch or play the presentation at any time by selecting one of the options of the Slide Show command.
1) Quick access bar gives you quick access to some useful commands. By default, the Save, Undo, Redo commands are displayed. You can customize the Quick Access Toolbar by adding your favorite commands to make the toolbar more convenient for you.

2) Slides tab allows you to view and work with presentation slides. You can add, delete, copy and reorder slides on this tab. You can also add separators on this tab to organize and separate your slides.

3) Structure tab conveniently shows the text of each slide. You can edit text directly in it.

4) Kind of slides. Customize your slide view by choosing one of the following options:
- Usual the view is selected by default, showing the Slides, Outline, and Current Slide tabs.
- slide sorter shows thumbnail versions of all slides.
- Reading mode only shows slides with navigation buttons at the bottom.
- slide show plays the slides in the current presentation.

5) Scale. Click and drag the slider to change the scale. The number displayed to the left of the slider indicates the scale percentage. You can also use the "Fit slide to current window" button.

6) Scroll bar. You can navigate through the slides by dragging the slider on the scroll bar or by using the Previous Slide and Next Slide arrow buttons.

7) Ribbon. It has all the commands that you will need while working on a presentation. It contains several tabs, each tab has several groups of commands. You can add custom tabs with your favorite commands.
What's more, special "tools" tabs will appear on the ribbon when you work with objects such as figures and tables.

Work in PowerPoint
ribbon And Quick Access Toolbar are the places where you'll find the commands you need to work with PowerPoint presentations. If you're familiar with PowerPoint 2007, you'll see that the main difference in the PowerPoint 2010 Ribbon is the placement of commands such as Open and Print on the pop-up menu.
ribbon
It contains several tabs, each tab has several groups of commands. You can add custom tabs with your favorite commands. Some tabs, such as "Drawing Tools" or "Table Tools," appear only when you are working with the corresponding object: a drawing or a table.
To customize the Ribbon:


If you can't find the command you need, click the Select commands drop-down list and select All commands.

To collapse and expand the Ribbon:
The ribbon is designed to be responsive to your current tasks and be easy to use. However, you can minimize it if it takes up too much screen real estate.
- Click the arrow in the upper right corner of the Ribbon to collapse it.
- To expand the Ribbon, click on the arrow again.

When the Ribbon is minimized, you can temporarily display it by clicking on a tab. And when you stop using it, it will disappear again.
Quick Access Toolbar
The Quick Access Toolbar is located above the Ribbon and gives you access to some useful commands no matter which tab you're currently on. By default, you can see Save, Undo, Redo commands. You can add commands to make the panel more user friendly.
To add commands to the Quick Access Toolbar:
- Click on the arrow on the right side of the Quick Access Toolbar.
- Select the commands you want to add from the list that appears. To select commands not listed, click More Commands.

The pop-up menu provides you with various options for saving, opening files, printing, or sharing documents. It is similar to the Office Button menu in PowerPoint 2007 or the File menu in earlier versions of PowerPoint. However, now it is not just a menu, but a full-page view that is much easier to work with.
To get to the popup menu:


2) Details contain information about the current presentation. You can view and change its permissions.
3) Latest. For convenience, the most recently opened presentations and folders with files are shown here.
4) Create. From here you can create a new clean presentation or choose a layout from a large number templates.
5) Print. On the Print panel, you can change the print settings and print your presentation. You can also preview how the presentation will look when printed.
6) Save and send option makes it easy to send your presentation via e-mail, post it on the Internet or change the file format. What's more, you can create a video, CD or handout with your presentation.
7) Help. From here you access Microsoft Office Help or Check for Updates.
8) Options. Here you can change various Powerpoint options. For example, you can change spelling, auto-recovery, or language settings.
Create and open presentations
PowerPoint files are called presentations. To start working on a new project in PowerPoint, you need to create a new presentation. You also need to know how to open an existing presentation.
To create a new presentation:
- Select Create.
- Select New Presentation under Available Templates. It is selected by default.
- Click Create. The new presentation will appear in the PowerPoint window.

To open an existing presentation:
- Click on the File tab. This will open a popup menu.
- Select Open. The Open Document dialog box will appear.
- Select the desired presentation and click Open.
If you've recently opened an existing presentation, you'll find it easier to find under Recent in the pop-up menu.
Sometimes you have to work with presentations created in earlier versions of Microsoft PowerPoint, such as PowerPoint 2003 or PowerPoint 2000. When you open these presentations, they appear in Compatibility View.
Compatibility mode disables some features, so you can only use the commands that were available when you created your presentation. For example, if you open a presentation created in PowerPoint 2003, you will be able to use the tabs and commands that were in PowerPoint 2003.
In the image below, the presentation is open in Compatibility View. You can see that many of the commands on the Transitions tab are disabled, only those that were available in PowerPoint 2003 are available.

To exit compatibility mode, you need to change the presentation format to the current version. However, if you work with people who work with older versions of PowerPoint, it's best to leave the presentation in Compatibility Mode and not change the format.
To convert a presentation:
If you want to have access to all the features of PowerPoint 2010, you can convert your presentation to PowerPoint 2010 format
Please note that the converted file may have some differences from the original in presentation markup.

Presentation is a classic way of making presentations. Displaying the most important information on the screen makes the report more interesting and understandable to the public. Nowadays, presentations are made using a computer and special programs. Thanks to this, a presentation with slides can be done in just a couple of minutes.
In order to make a presentation with slides on a computer, you will need a special program for creating presentations. The most popular program of this kind is PowerPoint, which is included in the Microsoft Office suite of office programs. Therefore, if Microsoft Office is already installed on your computer, then you have the program you need.
If Microsoft Office is not installed, then you can install it yourself. On the site you can download a trial version of Microsoft Office, which will work for 1 month. In the future, you will need to buy full version or purchase a subscription.
You can also make a presentation with free programs. For example, you can use the Impress program, which is included in the LibreOffice free office suite. To do this, go to the site, download the LibreOffice software package and install it on your computer.
In this article, we will tell you how to make a presentation using the example of PowerPoint from the Microsoft Office suite. Since this software package is very common and most users already have it installed.
How to make a presentation with slides on a computer
To make a presentation with slides on a computer, you first need to run the program. To do this, open the Start menu, go to the list of programs and find the PowerPoint program there. Also, this program can be launched using the search in the Start menu or using a shortcut on the desktop.
After launching PowerPoint, a list of different designs that you can use to design your presentation. Here you can choose any option you like. In the future, if you do not like the chosen design, you can change it without redoing the presentation from scratch. For example, let's choose a green color design called "Aspect".

After that, you will see the interface of the PowerPoint program in which you will make a presentation. The PowerPoint interface is divided into three parts. At the top is a tabbed toolbar, on the left is a list of slides, and in the center are the presentation slides themselves.
Initially, there is only one slide in the presentation. This is the title slide that will start the entire presentation. Here you need to enter the name of the presentation and some Additional information about it, for example, the name of the organization.

After filling in the starting slide, you can proceed directly to the creation of the presentation itself. This is done very simply, add a new empty slide to the presentation, fill it with information and move on to the next one. If you have previously worked with text editor Word, then filling out the presentation slides should not create problems for you, since everything works exactly the same here.
In order to make a new presentation slide, use the "Create Slide" button, which is located on the "Home" tab. Click on the arrow below this button and you will see full list possible slide layouts.

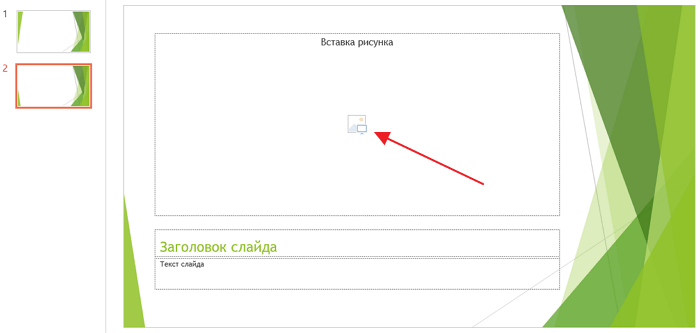
In the Create Slide list, select the slide layout that suits you best, and a new blank slide will appear in front of you. The new slide will have several fields that you need to fill in with information. These can be fields for inserting a slide title, text, image. To fill in text fields, you just need to click on the empty field and paste the text.

If the field involves inserting a picture, then you need to click on the icon and select the image to insert in the window that opens. Fields of other formats are filled in the same way, click on the icon and enter the required data.
If the standard slide layouts do not suit you, then you can remove some fields or, on the contrary, add new ones. Use the tools on the Insert tab to add new fields. There are buttons here that allow you to insert text boxes, pictures, tables, charts, videos, audio recordings, and more into your slides. For example, in order to add a new image to the slide, use the "Pictures" button, and to add a text field, click on the "Inscription" button and draw the required field size with the mouse.

You can also change the design of an already finished presentation. To do this, go to the "Constructor" tab and select one of the proposed designs there.

In order to make a full-fledged presentation, you need to set up transitions between slides. To do this, open the "Transition" tab and select one of the options. Also on this tab there is an "Apply to all" button, which applies the current transition settings to all slides of the presentation at once.

To preview the resulting presentation, go to the "Slide Show" tab and use the "From Beginning" or "From Current Frame" buttons, which start playing the presentation from the first or current frame.

The rest of the tabs also have useful tools, be sure to explore them yourself.
How to save a presentation on a computer
After the presentation is made, it needs to be saved. In PowerPoint, this is done in the same way as in other programs, you need to open the "File" menu and select "Save As". But, there are some features associated with the choice of file format. The main format for PowerPoint presentations is the PPTX format, also called " PowerPoint presentation". Using this format you will still be able to open the file and continue editing the presentation, so you need to save the presentation in PPTX.

But, if the presentation has already been made and you are ready to show it, then in addition to the PPTX format, you can save the presentation in the PPSX format, which is also called "PowerPoint Demonstration".
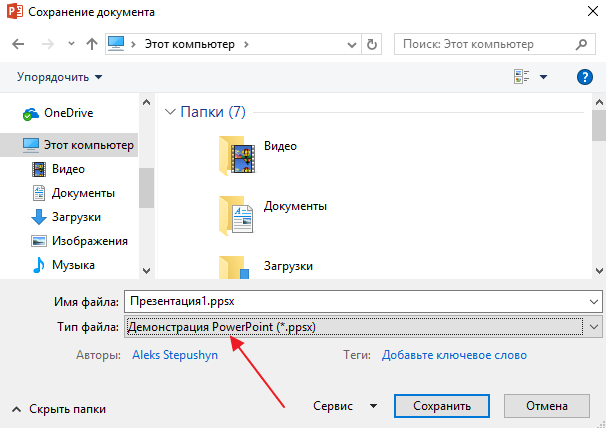
A feature of the PPSX or "PowerPoint Demo" format is that when opening such a file, the interface of the PowerPoint program does not appear, instead, users immediately see the first slide of the presentation, which is opened in full screen. This allows immediately after opening the file to start showing the presentation made. But, PPSX files cannot be edited, so you should always have a copy of your presentation saved in PPTX format.