Create a presentation with. How to make a presentation with slides yourself? Step by Step Guide to Create a Presentation in PowerPoint
How to present your ideas beautifully? PowerPoint helps you organize information in a simple and visual way. Below we give step by step instructions,how to make a presentation in powerpointbased on a template or from scratch.
- How to make presentation slides using a template
Before us is an empty slide containing two frames with dotted borders. The inscription in the top frameClick to add title . In the bottom frameClick to add subtitle .

Click on the tabFile (File). In the drop-down menu we find the itemNew.

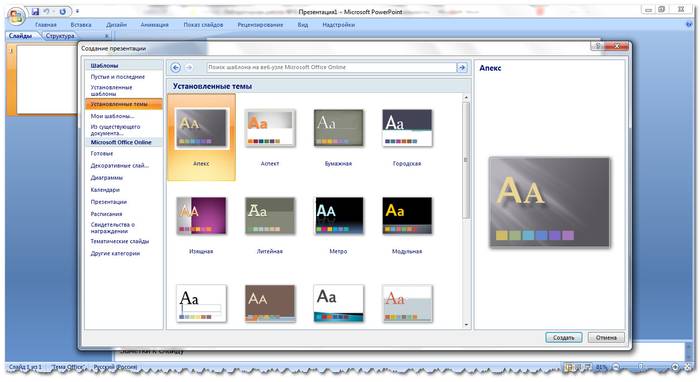
A selection window appears. You can choose to open an empty presentation for us (Blank presentation), recent patterns (Recent templates), typical templates (sample templates) or topics ( Themes).

Choose an item Sample template (Sample Templates). In a typical template, slides already have a ready-made background, font styles for headings and body text. The name of the ready-made template indicates what subject it is best suited for: for a report, for describing a route, etc.

To select a template, click on the thumbnail of the template. If none of the ready-made templates satisfies us, then you can select a design theme by clicking on the iconThemes.

Go back to the New tab, click the iconThemes. We get slides with a ready-made background, and we will choose the rest of the parameters ourselves.

If we have decided on a theme or template, we select it with a mouse click, the theme becomes the background of our slide.

When a slide with the selected design appears in the window, click on the frame with the inscriptionClick to add title (Click to add title) . The cursor appears in the frame. And we are typing the title text. We also enter text into a template frame with an inscriptionClick to add subtitle . If a subheading is not needed, the text frame can be deleted by clicking on the border and pressing the Delete key.

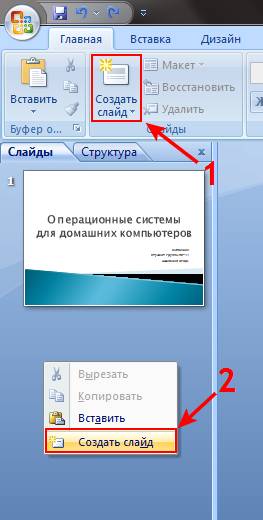
To do this, click on the buttonNew slide (New slide) tab Slides (Home)in the main menu. To do this faster, you can press the keyboard shortcut +[M].

In the same way, we add text to new slides by editing the text within the frames using the main menu buttons.

In the main menu, selectFile, then Save as , select the path to the folder and save the file in it.

To do this, click on the tabSlide Show , click on the leftmost buttonFrom beginning . To choose to go to the desired slide in the presentation, you need to press the left arrow key to go back, or the right arrow key to go further.
- How to make a blank slate presentation with slides in PowerPoint for Mac
- Opening PowerPoint
Depending on which version of MacOS is installed on our computer  computer, a blank slide in the program window will appear immediately, or you need to open a blank slide using the menu.

Cover page template opens via menu itemFormatmain menu. In the dropdown menu selectSlide Layout . Below we can choose pre-designed layouts for blocks of text, charts and images.

In the main menu selectInsertand in the drop-down list, clickNew slide (New Slide) . If necessary, then again select the slide format through the itemFormat, subparagraph Slide Layout .

Text blocks, pictures, diagrams, videos and other content are added through the itemInsertmain menu of the program.
Repeating elements can be copied on previous slides.
You can insert content through the menuSlide Layout , select the type of content to add, and browse for the file.

Subject ( theme) select through the toolbar or through the itemFormatmain menu. In the dropdown list, find the itemSlide Theme .
Change the background color by selecting an item from the dropdown list.Slide Background . In the selection window that appears, you can select the background you like from the ready-made set and choose whether to apply this background to only one slide or to all slides in the presentation.

In step Slide Show choose View Slide Show .
I II. Creating a Template Presentation on Older MacOS

Click on office orbin the upper left corner of the screen. ChooseNew. In the window that appears, select Installed templates orInstalled themes (Contemporary Photo Album) .

From the slides with topics on the left panel, we select our version and see how it looks on the full screen.
You can create a copy of an existing slide by clicking, hovering over the slide, right-clicking and in the context menu that appears, selectDuplicate Slide .
You can delete a slide by right-clicking on the itemDelete Slide .
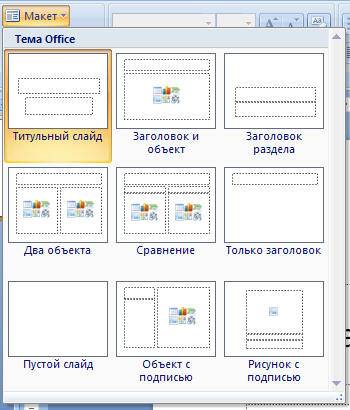
You can also change the slide layout by right-clicking and selectingLayoutin the menu that appears. Or you can select the menu itemLayout in the panel home.
To add a new slide, you can select from the same context menuNew (New Slide). You can also do this through the menu itemNew slide panels home.
We can change the sequence of presentation slides by dragging their thumbnails with the left mouse button pressed.

The purpose of the presentation is to help convey your idea to the audience, to offer options for choice. The text of the presentation should contain the main theses, keywords.
Key words and abstracts will be disclosed in oral speech and at the same time help to focus the listener's attention on the main thing.
No need to overload the slide with information, it is better to serve it in small portions on several slides. If we are talking about interrelated things that you want to put side by side, then you need to think about how to build a chain of slides so that their relationship is obvious. To do this, there are many opportunities for a single design: a single color, font, repeating graphic elements.

To make the presentation interesting, you need to dilute and illustrate theses with pictures, diagrams, use list elements.
To highlight the main thing in the text, you can use italic, bold, change the color of the text.
Flowers should not be many. You need to choose a few primary colors to meaningfully highlight keywords and elements to which you want to draw attention.
No need to use low-contrast color combinations, pale and pastel colors. Fonts are also better to use crisp, clear, easy to read. The presentation is designed for the audience, all objects should be clearly distinguishable and visible from afar.

In the main menu, select the View tab (Slide Show), click Slide Show (From Beginning) or press the F5 key, then the slide show will start in full screen mode. You can exit the view mode by pressing the Esc key.
If we need the presentation to run offline, without launch PowerPoint, choose meFile, then Save as and choose instead of the standard extension*.ppt extension *.pps (PowerPoint Show)in the list of format options.
It is best to use your own computer (laptop) to show presentations. So we will be sure that everything is reproduced as it should. The user's computer may have another manufacturer's presentation software. In this case, some effects may not be played. The same can be if the presentation is made in new version PowerPoint and the user has an older version. You can download PowerPoint Viewer for free from the Microsoft website. latest version and install it before showing. The same applies to the codecs required to view embedded video. The video files inserted into the presentation must be written to a flash drive or disk along with the presentation.
In the event that you do not have access to a licensed copy of PowerPoint, you can make a presentation in OpenOffice Impress and save the files in the program's native format and in PowerPoint format.
Be sure to check the spelling of the text. Rough spelling mistakes greatly spoil the impression of the presentation.
It is better to save a copy of the presentation file on external media in case of breakage
The above instructions may vary slightly in different versions of the program.
PowerPoint sequences can be recorded using macros.
Remember to save your work. Saving frequently while working on a presentation can save us a lot of time.
Quite often, during a presentation with a report or a report, a presentation of a new program or product, it becomes necessary to visualize some information in front of the public. The most popular program for this is Microsoft power Point 2007 is an environment for creating presentations with various effects. Now almost no event, such as a seminar, conference, diploma defense, is complete without graphic support created in power point. The development of technology has made it possible to reproduce presentations not only on a computer or TV screen, but also on interactive whiteboards and using projectors.
Power point overview
Making a presentation on a computer is not the only feature in Microsoft Power Point. With this program it is possible:
- impress the audience with an informative presentation;
- create graphic support for the target flow of people;
- scale slides by enlarging or reducing the desired areas;
- quickly switch slides, both automatically and manually;
- design a unique graphic support for the report;
- use both your own and the themes and designs developed by the program manufacturer;
- quickly and easily create the desired charts, graphs, etc.;
- add various visual and sound effects.
Video: business presentation
Components of a presentation
The presentation consists of slides, the number of which is practically unlimited. They are sequentially collected into a single file with the ".ppt" extension, which can be opened on any computer where the Microsoft Power Point program is installed.
Slides can be shown electronically or printed on paper.
On the slides you can place everything you need for the demonstration:
- text information;
- photographs, pictures, drawings, etc.;
- tables, graphs, charts;
- videos, films, clips;
- audio files;
- other graphic objects.
Slides in Power Point can be customized and modified:
- size;
- markup (location of objects on it);
- template (design and layout);
- visual and sound transition effects.
The initial editor window in the program looks like this:

The Menu bar contains all the important commands of the program, and the main and frequently used options are placed on the toolbar. This panel can be edited by adding or removing certain elements. By clicking on the "Create Slide" button, an empty template will appear on the screen, on which you have to work.
The left panel displays all the slides that make up the presentation. They can be in the form of their thumbnails, or they can be displayed in structured text, displaying headings or slide content. Also in this panel, you can move and change the position of the slides. The task pane (located on the right) will display the actions that you can use in the process of creating a show. At the bottom of the screen there is a Notes area where you can enter all comments on the created slide, which are visible only in the process of working on the presentation.
All areas on the home screen can be enlarged or reduced by placing the cursor on their end lines.
How to make your presentation step by step
Create a presentation for interactive whiteboard possible in several ways:
- develop a completely new presentation;
- from a standard or previously made template;
- from an already prepared file;
- from the autocontent wizard.
If we look in more detail, then in the new demo you need to do all the markup, design styles, fonts, etc. yourself. Reworking a finished presentation will not end up with a unique product. Choosing a template is similar to the previous method and allows you to use ready-made graphic and design developments from the creators of the program. If you use the "Auto Content" wizard, the program will ask you questions, and based on the answers, it will create the desired presentation template.
Start of creation
To start creating a slide show, you need to open the desired program.
This can be done via:
- Start;
- Programs;
- Microsoft office;
- Microsoft Office PowerPoint 2007.
IN open program a working window will appear in which you must select one of the previously listed methods for creating a slide show.
Video: Presentation in Power Point 2007
We do according to the template
You can create a beautiful presentation with a large number powerpoint templates. They include ready-made, in terms of design, slides where you need to enter data. Templates take into account:
- Background color;
- Slide color schemes;
- Fonts, etc.
You can create a slide show from a template through the menu:
- File;
- Create;
- Create a presentation;
- Templates.
Select the desired template and click "Create". A slide of the selected style will appear in the work area, which can be edited.

Loading slides
To create a new slide, click on the corresponding button on the toolbar. You can also do this by right-clicking on the slide thumbnail in the window on the left, choosing the same command.
In the presentation structure area, you can copy or delete slides by selecting them and pressing the corresponding keyboard buttons. Or through the menu that opens with the right mouse button when you click on the slide.
Slides can also be swapped:

You can change the layout of the finished slide through:
- Home;
- Layout.
Text is entered in special fields on the slide. When marking a slide, a place for text is already allocated automatically, but you can also add it to other places through the "Insert-Inscription" control panel item. Enter text in the field that appears.

The size of the input field will expand as you add text. You can finish entering by clicking on any free area of the slide.
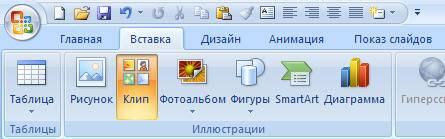
You can insert a picture or your picture using the command:
- Insert;
- Picture.

Or by clicking on the picture in the slide layout itself:
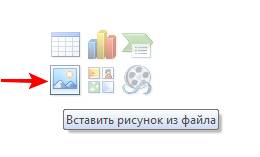
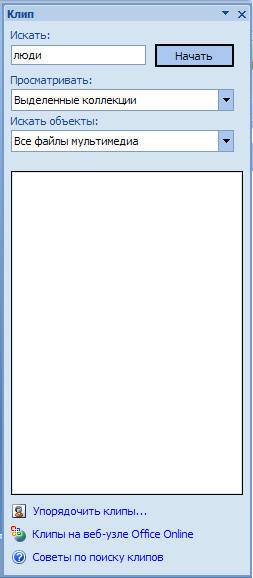
In the window that opens, select the desired file location and the image itself, and then click the "Insert" button. If you select "Clip", you will be prompted to find the image among the standard pictures of the program.
Any field on the slide can be moved and resized.
For this you should:
- click once on the desired object:
- then move the cursor over its borders - the option to change will be available.
It is possible to add sound, video, tables, graphs, charts and autoshapes to a slide. Their buttons are in the workspace of the slide and in the "Insert" menu. There are quite a few options for each object, and the accessible design of Microsoft Power Point makes it possible to quickly understand them.
New design
You can change the design of the site through the menu:
- Design;
- Themes.

It has subsections:
- Colors;
- Fonts;
- Effects.
You can apply the selected theme to the entire show or to a single slide. The color scheme within a particular theme can also change. To do this, click on the corresponding column in the design area. Select the scheme and right-click on it, applying it either to the entire presentation or to the selected slide: You can make your own image or fill as a background:
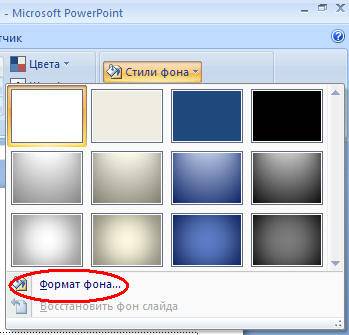
- Design;
- Background styles;
- background format.
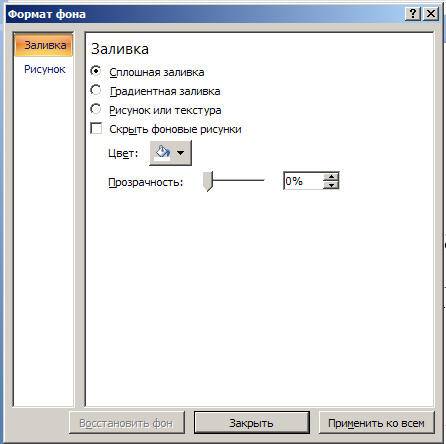
In this window, you can select the fill type:
- solid;
- Gradient (smooth transition from one color to another);
- Pattern or texture.
Text formatting is an important step in creating a slide show. A lot depends on the readability of the test.
To edit you should:
- highlight the desired piece of text;
- then use the tools on the main taskbar.
By default, each new line in the text is treated as a bulleted list. This is changed via the toolbar. Power Point also contains buttons for setting special effects, text direction, changing line spacing, and so on. When selected in the workspace of a slide graphic image, the Picture Tools tab appears on the toolbar.
There you can change:
- Brightness;
- Contrast;
- Display style;
- Color;
- Size.
Video: Presentation in 10 minutes
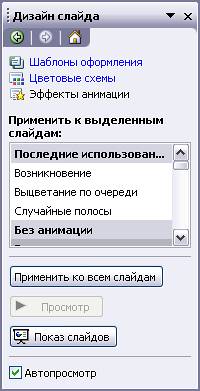
Animation
Slides filled with information should be given a beautiful visualization. This is done using "Animation Effects" in the "Slide Design" task pane. From a large list of effects, you can choose any for each object on the slide. Then during the demonstration they will beautifully appear on the screen. One effect is applied to one slide, but you can click the "Apply to all slides" button and it will be on all slides of the presentation.
You can also customize the animation for each object on the slide:
- select it and right-click, selecting "Adjust Animation";
- or go to the menu item "Animation" - "Animation settings".

Then a panel will appear on the right side, where you can add a separate effect to each object, as well as adjust its speed, soundtrack and appearance time.

Adding transitions
The transition is used when changing one site to another. A new slide can appear immediately or gradually. The gradual appearance makes the presentation more beautiful and interesting.
To set up a transition, select a slide and go to:
- Animation;
- Animation setting:
- Next, you should choose the transition effect you like, the sound for it and the speed of the process. An automatic transition is also configured (then its time is set) and by mouse click. The transition can be done for each slide separately, or you can set it up for the entire presentation at once.
Completion
At the end of the presentation, you should adjust the parameters of the slide show itself to avoid unpleasant moments during the presentation. This is done in the "Slide Show" - "Demonstration Settings" item:

All the main display parameters are set here:
- slide management;
- slide change;
- Slide numbers.
You can also hide slides in the Slide Show menu that you don't want to show temporarily, but that you can't delete.
View finished work you can by clicking on the button "From the beginning":
- Save as…;
- Choose a save location;
- Write the title of the work;
- Save.
Microsoft PowerPoint- an affordable and simple program for creating presentations on a computer. A variety of visual effects and design themes will allow you to quickly create an original and unique presentation for your public speaking or school assignment.
>Do you want to know how to make money online?
Download the free book by Vladislav Chelpachenko
=>> "10 steps to the first million in the infobusiness"
Slides

Clarity of text on presentation slides. We carefully approach the choice of the background and color of the text of the slides. If we choose a dark background, then the text should be light (white or yellow), if the background is light, then the text should be dark.
We try not to use a white background and black text, this is boring and sets the audience only to listen to information, excluding dialogue (the student’s association in the lesson is triggered - the quieter you sit, the less likely it is that they will be called to the board).
We do not use a background of slides that is too loaded with objects, your information that you want to convey to the audience may be lost against their background. It is best to use a plain background with your logo and/or web address.
Presentation. How to make a presentation. VIDEO
For ease of perception of information, watch the video from which you will learn where to make a presentation and how to make a presentation correctly.
How to make a presentation in Power Point
Watch a video on how to make a PowerPoint presentation.
How to make a presentation
Watch the video on how to make a presentation.
How to embed a video in a presentation
Watch the video tutorial on how to insert a video into a presentation
Positive attitude when creating a presentation
From the first time, few people get a presentation, so you should not despair. Sooner or later, all failures come to an end.

Many useful information waiting for you ahead. In order not to miss, subscribe to.
P.S. If you want to learn how to make money online, then the best place to start is affiliate programs. So that you have no doubt that earnings in affiliate programs are a reality, I post one of the screenshots of my affiliate rewards.
Do you want to know what mistakes beginners make?
99% of beginners make these mistakes and fail in business and making money on the Internet! Take care not to repeat these mistakes - “3 + 1 BEGINNER MISTAKES KILLING THE RESULT”.


Today, almost every report or speech is accompanied by a presentation. It can be a scientific conference, a thesis defense, a report on the work done, progress in the development of a company or business over a certain period, advertising of new products that will appear on the market, and much more. The presentation helps the speaker present all the necessary information in a visual form. You can insert the necessary pictures and diagrams into it, videos that can display the result of your work, and various audio files. Thanks to all this, the listener will better catch the material and remember all the necessary information that you wanted to tell.
PowerPoint is a powerful presentation tool. With it, you can make an excellent presentation that meets all necessary requirements. Choose backgrounds, headings, colors, insert graphs, tables and charts. In general, the field for action is huge, now it all depends on your imagination.
In this article, we will look at what tools you can use to create presentations in PowerPoint. How to add and design slides, write text, insert graphs, charts, tables, video and audio files.
So, I think you have decided on the theme of the presentation. It is important to understand that a presentation is aid achieving the goal, and the result will largely depend on your report. But a beautiful and well-made presentation, of course, will play a significant role.
Adding new slides
Launch PowerPoint on your computer. On the "Home" tab, click on the "Create Slide" button and select any of the proposed layouts. You can add blank pages, you can add areas to enter headings, text, or insert a picture.
The left side shows all the slides in the presentation. A new page is added immediately after the one that is selected in this area with the mouse.
To remove a slide from a presentation, select its thumbnail, they are presented on the left side, right-click and select Delete Slide from the context menu. To move a slide, click on it with the left mouse button, and without releasing it, drag the thumbnail between the other two - the insertion point will be marked with a black horizontal bar.
To change the layout of an already added slide, select it and on the tab "Home" click the button "Layout". Select the one you need from the list.
All the information described is discussed in detail in the article: how to insert a slide into a PowerPoint presentation. By clicking on the link, you can read the article.
slide design
For our presentation to be beautiful decoration, and the pages were not white, go to the Design tab. In the "Themes" group, you can select one of the suggested themes. Here you can also choose a different color scheme for the selected theme: "Colors" suitable for the presentation "Fonts" and "Effects".
If you want several presentation slides to have a different design, hold down "Ctrl" and select them with the mouse. Then choose the theme you want for them.
The "Background Styles" button will help you change the background for the page.
Do not use too bright and poorly combined colors in your presentation - this will distract the viewer. Try to limit yourself to three or four colors for the theme.

Text on slide
If you chose layouts with areas for entering titles and a test, click in the desired area and enter the text there. By the way, the text can be both printed and pasted from any other document.
If your pages are blank, go to the "Insert" tab and select "Inscription". Using the mouse, draw a rectangular area on the slide, where you can then write the text. In the same way, you can add a new text entry area to any slide.
To move the area with text, move the mouse cursor over the border, it will take the form of an arrow pointing in four directions, press the left mouse button and, without releasing it, drag the area to another place on the sheet. You can change the size by hovering over one of the markers.

You can choose the appropriate font for the text on the Home tab in the Font group. Preselect desired text. Here you can also choose the style of the text, the spacing between lines, its alignment, and so on.

When text is selected, a new tab appears on the ribbon "Drawing Tools". Here you can choose the appropriate style for the text and for the shape in which it is inscribed.

Make headlines larger than body text. Don't use poorly readable fonts. The main text on the sheet should not be much, make it of such a size that they can read from the back rows. Use the same font for headings on all slides, the font for body text should also be the same.
Don't overdo it with underscores and stuff. Choose the color of the text so that it is readable against the selected background.
Inserting pictures, charts, tables
To make the presentation interesting, the text must be diluted with images. Go to the "Insert" tab and select "Picture". Find the desired picture on your computer and click "Insert". Using the mouse, drag it anywhere on the page and resize it.
You can also use the copy-paste commands. Open a document such as Word or File Explorer, find the image you want, copy it, and paste it on a slide in your presentation.

Try not to stretch small images so as not to spoil their quality. Don't put too many pictures on one slide. It is better to put the image on a separate slide and sign it.
If you need to add a chart to the presentation, on the "Insert" tab, click on the button "Diagram". Choose one of the suggested ones and click "OK".

A window will open Excel programs. Enter the data on the basis of which you want to build a chart. To change the data range, drag the bottom right corner of the table. After that, click on the cross to close the window.
To learn in detail how to build a chart in Excel and how to build a graph in Excel, follow the links and read the articles.

To edit a chart, select it and go to the tab "Working with charts".

A table is added to the presentation in the same way: "Insert" - "Table", select the desired number of rows and columns. To work with a table, go to the appropriate tab.

Embed audio and video
Inserting an audio recording into a presentation can come in handy in many situations. For example, you are making a presentation for your birthday, or you need to listen to a fragment of a song or a file recorded by you personally during the report. If you want the music to play during the presentation, choose a calm composition and preferably without words.
We select the slide from which the playback of the composition will begin, and go to the tab "Insert" - "Sound" - "Sound from file". Find the entry on the computer, after it is added, a speaker icon will appear on the sheet.

To embed a video, do the same, just click "Video" - "Video from file".

Transitions and animations
The appearance of all slides can be made more interesting by using different transitions in the program. Open the "Transitions" tab, select the desired slide on the left side, and select any transition from the list. You can immediately see how the slide will appear on the screen.
In a group "Slide Show Time" you can set the duration of the transition, and how to change the slide, on click or after a certain time. Here you can also select the sound for changing slides.

Animation is used to make text appear effectively on a slide. Select the desired area with the text with the mouse and go to the tab "Animation". Click here "Add Animation" and choose one from the list.
Click "Area of Animation". The desired area will appear on the right side.

Don't overdo the special effects. If your presentation is equipped with various sound effects, blinking and jumping text, it will be difficult for the viewer to concentrate on the main information.
slide show
That's it, we're done creating the presentation! It's time to see what happened. Go to the "Slide Show" tab and click the "From Beginning" button. The slide show will start in full screen mode.
A presentation is a concise and intelligible presentation of information that allows a person to explain the essence of the issue much more effectively. Presentations are created by many users at different stages of life: schoolchildren, students, businessmen, etc. Today we will consider in detail the issue of creating a presentation.
First of all, a few words about the program for creating presentations. Today there is a fairly large selection of office applications, some of which are distributed on a paid basis, while others are completely free. This includes LibreOffice, OpenOffice, Microsoft Office and many others. Today we will consider the process of creating a presentation using the example of perhaps the most popular program for these purposes - Microsoft PowerPoint.
A few words about the material
Before you start creating a presentation, you must definitely take care of the material:
1. Text. Of course, the presentation should not fit the entire textbook. The presentation should include as much as possible Short text, which will eloquently talk about the essence of the issue and explain some important points.
2. Pictures. A presentation without pictures not only looks dull, but can also explain the topic that concerns you to the audience less intelligibly. Use in your presentation both your own pictures and those downloaded from the Internet. The main thing is that the pictures are strictly on the topic.
3. Graphs and diagrams. Graphs and diagrams are developed in the process of creating a presentation. Another good way to visually demonstrate information.
4. Video and music. Optional item, but if you have a video or sound related to the topic, then you can add it to the presentation.
5. Plan. Without a pre-created presentation plan, in most cases, they completely lose their information content. Be sure to set the goal of the presentation, think over step by step how the presentation will begin, how you will get to the point of the issue, how it will end.
Getting Started in Microsoft PowerPoint
Create and delete slides, customize the template
Each presentation has separate slides that briefly demonstrate this or that information.
To add a new slide to PowerPoint, on the "Home" click the button "New slide" .

If you click on the icon itself, a simple slide will be displayed on the screen, which, if necessary, can be changed later. If you click on the inscription itself "New slide" , an additional menu will appear on the screen, in which you will immediately be asked to select a slide template.

Switching between slides is carried out in the left area of the window, where their thumbnails are located. If necessary, slides can be moved to a new position on the presentation. To do this, hold down the slide with the mouse cursor, and then move it to a new area of the presentation. As soon as you release the mouse button, the slide will be fixed in the new position.

Extra slides can be deleted. To do this, right-click on the slide thumbnail and in the window that appears, select "Delete Slide" .

If you want to change the slide template, then right-click on the slide and in the window that appears, go to "Layout" . An additional window will open on the screen, in which you can select a new template for the slide.

Change the look of your slides
All slides are white by default. To diversify the slides, you can give them a new background.
To do this, go to the tab "Design" and pay attention in the program header to the block "Themes" . There is already a set of selected themes where fonts and backgrounds are configured. If you're in a hurry, use themes for your slides.

In order to see how the theme will look on your slide, just highlight the slide thumbnail, and then move the mouse cursor over the theme you like. If you like the theme, apply it by simply clicking on it once with the left mouse button.
After applying the theme, the block to the right will change "Options" , which provides several options for the appearance of your theme.

The button is further to the right. "Background Format" . By clicking on it, an additional menu will open in the right area of the window, in which a more detailed background setting is performed: it is possible to apply and customize the fill, add your own image available on the computer, etc.

By default, the selected background will be applied only to the current slide, but, if necessary, all slides can be given a similar background - you just need to click on the button "Apply to all" .

Working with the text component
And so we smoothly moved on to working with text. Adding text is very easy: just click on the desired slide block, after which you can enter text or paste it from the clipboard.

Pay attention to the small icons that appeared around the frame: the circles allow you to expand or, conversely, reduce the block in which the text is placed, and the arrow is responsible for the rotation, i.e. you can rotate the text to any angle.

Go to the tab in the program "Format" . Here you can perform detailed setting text, as it is done in Microsoft Word: font, color, size, position on the page, break, etc.

Working with charts, graphs and tables
We smoothly move on to a visual demonstration of information.
Charts and graphs allow you to clearly show the dynamics of something, for example, profit figures for the past and current quarter.
First of all, go to the slide where the chart or graph will be located. If the slide contains several blocks reserved for images and graphics, then click on the one you need.
To add a chart or graph to your presentation, go to the tab "Insert" , and then click on the item "Diagram" .

A window will appear on the screen in which you will need to select the appropriate option for a graph or chart.

The screen will display a table with indicators filled in for example. In the first column, you will need to enter the names of the parameters, and in the second - the indicators for each of the specified parameters.

If you need to place a table on a slide, open the soft slide and select the block in which the table will be placed.

Go to tab "Insert" and select the item "Table" .

A simple table editor will open on the screen, in which you will need to manually specify the number of rows and the number of columns.

After the table is created, a tab will appear on the screen. "Constructor" , which is configured in detail appearance tables.

Filling in the table is carried out in the usual way - you just need to select a cell, after which you can proceed to filling it out.

Working with pictures
Let's move on to the images. In order to add an image to a slide, go to the desired slide, select the block in which the image will be added, go to the tab "Insert" and select the item "Drawings" .

Windows Explorer will open on the screen, in which you will need to insert the desired picture.
An image will be displayed in the desired area of the window, which can be stretched, narrowed and rotated in the same way as it was done with the text.

Also, a tab will automatically open on the screen. "Format" , in which the display of the picture is configured: borders, correction, adding effects, etc.

Work with music and video
Inserting sounds and videos into a presentation is done in the same way: go to the desired slide, select the block in which the media file will be inserted, open the tab "Insert" and select the item "Video" or "Sound" .

Working with animations and transitions
When the main part of the presentation is ready, you can move on to setting up animations and transitions. Transitions will provide a smooth and beautiful change from one slide to another, and animation will beautifully display the contents of the slide.
To set up transitions, open the tab "Transitions" , and then select the appropriate one from the suggested transitions.

Optionally, a different animation can be applied to each slide, but if you want to keep the same transition style for all slides, click on the button "Apply to all" .

You can also set the duration of the transition from one slide to another, and, if necessary, each transition can be accompanied by a sound, and you can choose one of the proposed sounds or upload your own.

By default, the program moves from one slide to another with a mouse click, but, if necessary, the program can do this automatically. To do this, you need to uncheck the box. "On Click" , and then specify how long the slide will play.

Now a few words about animation. To add animation to a slide, go to the tab "Animation" , select the desired slide, and then the object on which the animation will be applied. Then you just have to click on the item "Add Animation" .
A fairly large list of available animations will be displayed on the screen. After applying the animation, the system will immediately demonstrate it, after which you can leave it as it is, change it to another one, or delete it altogether.

To the right, you can set whether the animation will play automatically or on mouse click, set the duration of the animation, as well as the delay.

Saving a presentation
The creation of the presentation has come to a logical conclusion, which means that it is time to save it to your computer.
To do this, click on the button "File" and go to the tab "Save" . If necessary, specify the name of the presentation and the location on the computer, and then to the right click on the button "Save" .

Show presentation
And a few words about how to show a presentation. In order to show a presentation on a computer, it must be opened in PowerPoint, go to the tab "Slide show" and then select one of the items to choose from: "At first" or "From Current Slide" .

If, when setting up transitions, you set the automatic change of slides, then you just have to wait for the presentation to end, if not, you will switch between slides by yourself with mouse clicks.
A small conclusion. And although we have not considered all the nuances of working with PowerPoint, this article will give you a comprehensive idea of \u200b\u200bworking with this program.