How to make natural soap at home. Homemade soap making liquid soap from remnants
AT recent times homemade soap making is becoming more popular. Soap made from natural ingredients is environmentally friendly and beneficial for the skin. There are two options for making soap. In the first case, the soap base is made by hand, but you have to work with lye and follow exact instructions. The simplest option is soap making using ready-made soap base. For those who decide to make soap for the first time, it is better to opt for the second method, the technology of which is described in this article.
Choice of Ingredients
Professionals add a variety of ingredients to the soap, depending on what type of skin the soap will be intended for. The main components include:
- Soap base. For home cooking, a simple baby soap is considered an ideal option. It contains glycerin, lanolin, natural oils that moisturize the skin and relieve irritation. For soap making, it is better to choose an unscented soap.
- A base oil that improves the quality of the soap. The most popular oils are jojoba, olive, peach.
- Special or food coloring To give a rich shade, as well as fruit and vegetable juice, chocolate.
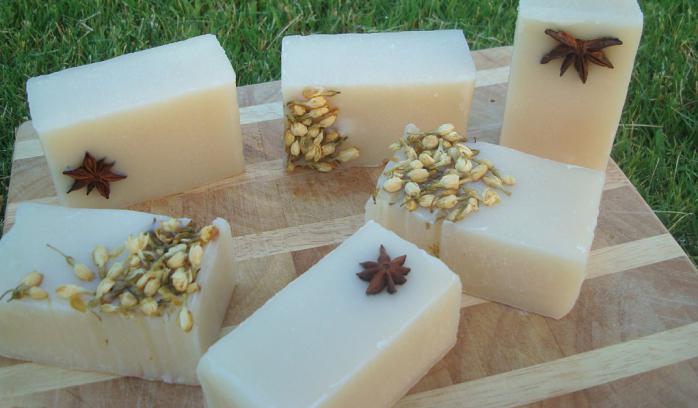
- Additives are used depending on the recipe. As additional ingredients, you can take: honey, dried herbs and flowers, cream, ground coffee.
Inventory
In addition to the listed ingredients, soap making will require:
- Grater. It is better to choose a grater on which the chips are smaller.
- Iron saucepan.
- Two plates. One plate of glass or porcelain for a water bath, the plate should go into the pan. Another plate is needed to melt the butter.
- Knife for cutting soap.
- Several spoons.
- Buy molds for filling in a specialized store, or you can use disposable jars, baking molds.
Instruction
The process of soap making of any soap consists of the following steps:
- We rub baby soap on a grater.
- Pour water into a saucepan on the stove. After the water boils, put a plate with chips in it. The edges of the plate should not be filled with water.
- Periodically stir the mass, the soap should not boil.
- When all the chips are dissolved, add 3 teaspoons of oil per 100 g of chips, half a glass of hot milk or water.
- Later, add additional ingredients according to the recipe: herbs, flowers, honey or chocolate. Cook the resulting composition for a few more minutes.
- Remove the plate from the water bath, then add the essential oil, dye.
- Pour hot soap mixture into molds. Moreover, you can combine different colors, resulting in beautiful curls.
- We put the molds in the refrigerator so that the soap becomes solid. When the soap hardens, we take it out of the molds and leave it to dry for two to seven days.

Pine massage soap recipe
Natural coniferous soap is one of the most useful. It gently cleanses pores, removes toxins. Pine soap also has exfoliating, soothing and bactericidal properties. For creating this soap you will need:
- 100 g of soap or soap base, preferably transparent;
- Chopped needles of spruce and pine - 1 teaspoon;
- Loofah;
- Alcohol;
- Essential oil of fir;
- Dye green;
- Moulds.
The preparation technology is the same as for ordinary soap. In the process of cooking, pour needles or add coniferous broth instead of water. At the end of cooking, add fir oil and dye. Pour into molds with loofah. Spray the top with alcohol.


cherry soap recipe
Cherry soap has a pleasant aroma, makes the skin silky. Compound:
- Transparent soap base - 100 g.
- Rosehip, fucus, grape seed, rose oil. Each oil is 1/3 teaspoon.
- Freshly squeezed cherry juice - 10-20 ml.
- Sugar - 1/2 teaspoon.
- Dyes: pink, red, burgundy.
Pour warmed cherry juice with sugar into the melted soap base, add oils and mix thoroughly. Pour the mixture into three glasses and add a different dye to each. Then pour the soap from the glasses into the molds, mixing the colors.

Soap making does not require special skills. A variety of recipes, forms, additives makes the process exciting and interesting.
View Mode
recipes:
Theoretically, it is easy to cook soap: once - melted, two - dyed-flavored, three - poured into a mold and you're done! In practice, many nuances are revealed that can not only harm appearance soap, but also completely spoil it. We reveal some of them in ours, describing in detail all the subtleties of the process, but there are things that are better to show visually. For those who find it easier to see once, we have prepared recipes with photos.
Our collection contains the best recipes for soap making at home for both beginners and experienced soap makers. simple recipes You will find soap making in the section "soap from the base", and if you are looking for something more complicated, look in the next section and choose your favorite soap making recipe from scratch.
In addition, not only soap, but also cosmetics, candles and even cookies, cakes and sweets can be prepared from the components on sale. And the "packaging" section will help to present your masterpiece beautifully.
Our collection is constantly updated, and if you find something unusual on the Internet, and do not know how to do it, leave a request for our forum and we will be happy to prepare a photo recipe.
We carefully check and repeatedly test each product that we offer you. All soap making recipes for beginners are the result of many years of experience of our masters, just like you, who are in love with home soap making. Recipes contain not only cooking technology, but also full list necessary materials and tools, so you just have to prepare everything you need and enjoy your creativity!


Now we come close to making whipped soap in a cold way.
To decorate our prepared bases, as well as for independent festive (and not only New Year's) cupcakes, whipped soap is the best way.
Whipped soap is loved by gentle love for a number of benefits:
- It is definitely more gentle compared to the usual classic toilet soap.
- Its airy texture melts on the skin, leaving only pleasant sensations after washing.
- It doesn't sink in water. And for children, it can become another toy in the bathroom.
- It looks very attractive compared to the smooth and even classic soap from scratch.
But at the same time, whipped soap has several disadvantages:
- It rinses out a little faster than regular toilet soap.
- Longer maturation compared to conventional classic sodium soap.
- You want to return to it again and again, thereby forcing yourself to make new batches of soap!


Soap is one of the most common products used by humans in Everyday life. And although in any point of sale it is commercially available, and the choice in specialized departments and stores is simply huge, the topic of do-it-yourself soap making is very common. BUT main reason that such soap is in demand. do-it-yourself basics, we will consider in this article.
History of soap making
Using soap every day, we know very little about it, as a rule, this knowledge is limited to issues related to its use. Meanwhile, it is an ancient subject and has a very interesting story. According to existing legend, the washing properties of soap ingredients were first used in Rome.
On Mount Sapo, which exists there, rituals were performed to sacrifice animals to the gods through their burning. In the rain, the ashes from the fire and the fat of dead animals were washed into the river. Over time, people noticed that clothes were washed much faster in this river than in others.
The beginning of soap production can be dated to the 6th century BC. e, and the Phoenician and Gallic tribes are considered the first soap makers. Based on written sources, the first records of soap date back to the 1st century AD. This occupation was most common in the places where the raw material base existed, namely, where there was a lot of soda, olive oil, fats and wood for burning and obtaining ashes.
Soap composition
To create soap, you need to have certain components available, if at least one is missing, then nothing will work:

Fat or oil, it does not matter whether they are of animal or vegetable origin;
Alkali (caustic soda);
The process of making soap is quite simple - combine all the components and wait for the soap to solidify. They used to do this, but today, with a huge choice, certain requirements are put forward for soap, especially manual robots, including aesthetic ones. Although the production process is simple, there are many secrets, as, indeed, in any business. Despite the fact that there are not many components in the soap, people still managed to make it easier for themselves. homemade. So they appeared from the soap base.
What is soap base
In the process of soap making, it can be called the beginning of all beginnings. Recipes for homemade soap from a soap base are simple and affordable, because it is practically a soap that does not have color and smell. That is, having this component in hand, you can develop a flight of fancy to unprecedented heights.

If, however, when making soap at home, only natural ingredients can be dispensed with, then the soap base, in addition to vegetable oils and glycerin, also contains surfactants - surfactants. Most often, buyers of such soap seek to purchase exactly natural product, without chemical additives, but today it is difficult to create it so that it meets all the requirements, and even at an affordable price. It is for this reason that the soap base is in demand among lovers of creating soap at home.
We make soap. Where to start?
And now let's take a closer look at how to create soap self made. Soap base recipes are simple, so this process will not cause difficulties. First of all, you need to understand what kind of result you would like to get. Although soap making itself is not difficult, but, nevertheless, the soap base does not have the color, smell and other qualities that we would like to see in the end. To fill these gaps, it will be necessary to add some components. For example, by adding oil, we can reduce soap foam. Therefore, without studying basic course not enough
So what is the first thing you need to make soap from the base? Recipes (soap making recipes are quite simple) are detailed and understandable.
Components for crafting:
- Soap base.
- Cosmetic oils and essential oils.
- Food colorings. They are the most harmless.
- Fragrances, dried flowers.
Tools:
- Moulds.
- Scales, preferably accurate (electronic).
- Thermometer, special syringe.
Basic soap making lesson
Homemade soap recipes from a soap base in this case will be the simplest. For example, honey soap.

- Soap base (transparent) - 100 g.
- Honey food flavoring - 4-6 drops.
- Refined jojoba oil - 0.25 tsp.
- Natural honey - 0.5 tsp.
1. It is necessary to determine the right amount of base.
2. We cut the soap base. Can be cubed, can be grated on a coarse grater. We melt. To do this, you can use a microwave or gas, but it must be remembered that in no case should the base boil. And the optimal temperature is 60-65 degrees. A thermometer, preferably an electronic one, will be a good helper in observing the temperature.
3. Add oil, flavor, honey. It is important to adhere to the dosages given in the recipe here, as an excess of ingredients can affect the quality of the soap and its ability to harden.
4. If in the future it will be necessary to add a dye to the soap, then this must be done carefully. Firstly, for uniform distribution over the soap, the latter must be constantly stirred, and secondly, so that the soap does not “dye” in the future, it is important not to overdo it with the amount.
5. The mixture must be thoroughly mixed with a small whisk or wooden sticks and, pouring into molds, allowed to cool. In this case, you can sprinkle the spilled liquid with alcohol to avoid the formation of bubbles.
soap additives
If you want to make colored inserts, for example, flowers, shells, etc., in soap base soap, it is better to take handmade soap recipes with a transparent base. The liners themselves are made using special forms, while the base can be used white color. Inserts are made according to the same principle as soap:
To add liners to soap, you should:
- Melt the soap base.
- Add all the ingredients listed in the soap recipe.
- Pour a small layer of liquid into the mold.
- Insert inserts into it. If there is concern that they will melt, then you can first place them in the refrigerator.
- Pour the rest of the liquid, while cooling it a little, stirring with a spatula, and pour without getting a jet on the liners.
Soap base handmade soap recipes
Handmade soap can be made with various additives. They can serve as:

Perhaps handmade soap recipes from a soap base with the addition of dried flowers will cause difficulty in understanding. But there are absolutely no difficulties in making such soap. For example, consider a recipe with the addition of calendula flowers:
- Soap base (white) -50 g.
- nutmeg - 0.25 tsp
- brown 3-4 drops
- Dried calendula - 1 or 2 tbsp. l.
- Form and mixer.
1. To prepare a decoction - 100 ml of boiled water and 1 tbsp. l. colors. Let the decoction stand for up to two hours.
2. Melt ½ of the soap base. Add a decoction of calendula and 2 or 3 drops of paint to the base. Beat the base and all components, without removing from heat, until the mass increases. The decoction should be added carefully, as the soap can later be very brittle. Yes, and whipped it is also fragile.
3. Pour the mixture into the mold, filling it halfway, but this must be done quickly so as not to freeze.
4. Prepare the second part of the soap in the same way, but add 1 drop of dye.
5. Pour the second part of the soap into the mold on the already filled one. Decorate with calendula flowers from a decoction, while they should be “drowned” a little in soap.
Once the soap has cooled, you can use it.
Soap making is a very exciting and interesting process. This article will look at several soap making workshops that even beginners can do. Today we will learn soap making for beginners at home and detailed wizard the class below will help you take the first steps in this direction.
We make a care product using the soap making technique for beginners
Soap can not only be bought, but you can also easily cook it yourself at home. This requires alkali, animal and vegetable fats, oils.
In this case, sodium hydroxide (NaOH) is used as an alkali, which adds soapiness to fats. Ash, or lye at its base, is suitable instead.
Before we start learning how to make soap, let's look at the ingredients for making your own soap.
The first thing you need is a soap base. To do this, you can use baby soap or a ready-made soap base made from titanium dioxide.
Next, the base composition must be melted in a water bath. Then add essential oils. They will play a major role in providing useful properties your skin, so you need to choose them according to your skin type. You can use coconut, almond, olive, castor or whatever you have.

Let's start making soap.
We take the base and melt it in a water bath. To do this, you can use baby soap or a ready-made base.

The next step is to add essential oils.
Gently mix and now you can proceed to the future design of soap. To do this, add essential oils, dyes.
It is important not to overdo it with the amount of essential oil, as in large quantities it can do more harm than good.
Now pour the resulting mixture into molds.

We send it to the refrigerator until it hardens and after that we give a few more days to dry.
Our soap is ready to use.

Probably everyone has leftover soap at home and now they will be used as the main ingredient. In this homemade soap making tutorial, we will look at the best option for a beginner in this business.
For this soap we need:
- Soap residues - 100-200 g
- Transparent soap base 100-150 g
- Dyes
- The following tools will be used:
- Formic alcohol
- Soap mold
- Basis melting vessel
- Grater

In the description of the ingredients, there are no base and essential oils, since all this is in the fragments and when mixed with ethers, an unpleasant odor can form. Therefore, these ingredients are not used.
We rub, form curls from the remnants of soap. We cut the base for quick melting. We put everything in separate dishes.
Melt all the ingredients except the curls.
Add dye to the transparent base
Sprinkle the delayed curls with formic alcohol. This will improve the adhesion of the melted base to the pieces.
Fill in the second layer. In our case, it is gold. You can not wait for the first layer to harden.
Spray with alcohol and pour the third layer.

This is what the finished soap looks like:

Leave the soap in the refrigerator to harden. After that, we take it out of the form.
Trim pieces on all sides. These fragments can be used in the next preparation.
The resulting soap has a unique pattern. This is what he is good at, in the process of cooking it is impossible to predict what will happen in the end.
Detailed video master classes can be viewed in the following video selection.
Video on the topic of the article
Helpful Hints
Until about 1916, making soap at home was a common occurrence.
Using the remains of animal fats, as well as various additives, families prepared their own detergents for cleaning clothes and for personal hygiene.
During World War II, when animal fats were available in limited quantities, German scientists developed synthetic detergents, and as a result, Soap as we know it today was born.
Homemade soap became less popular, and gradually its use came to naught.
In recent years, the process of home soap making has seen a resurgence.

Making soap at home
Homemade soap is convenient for your wallet: you can make a lot of soap and it will cost you less than buying the same amount in the store, you can also use old remnants to create new soap.
Homemade soap is good for your body: it contains no potentially harmful chemical substances found in commercial soaps.
Unusual skin care productsHomemade soap is good for environment: it does not contain synthetic materials that accumulate over the years in sewer sewage and endanger natural resources.

Before you start working on making your own soap, it should be emphasized that this process can be dangerous. Although you quickly adapt to the process, it is worth starting to create only when the security procedure is fully understood.
A little general information about homemade soap

Soap is a combination of water and lye with the addition of various oils. Water and lye are quite difficult to combine correctly, because they must be brought to similar temperatures.
How to make soap at home
When lye and water are mixed, the resulting substance becomes very hot, so it must be allowed to cool before adding oils there.
Oils must be heated very carefully. Each oil has its own saponification index, which tells you how much alkali is needed to turn this oil into soap. Therefore, if you use coconut oil, do not replace it with olive oil.

Lye is very caustic, therefore avoid contact with skin. It gives off dangerous fumes, among other things, so wear a respirator and goggles when using it.
You will also need a soap mold. Take whichever you like. You can take one large one, then a large piece of the resulting soap will need to be cut, use a metal string for this, since It's not safe to do this with a knife.

The hardest part about making soap is knowing when it's ready. This is judged by the condition called "next". This is the state when a drop of soap remains on the surface without spreading quickly.
Soap with triclosan harms the heart!Try to set the speed of distribution of a drop of honey on the countertop. FROM ready-made soap the situation is similar.
Soap at home: recipes
Here are the ingredients to make a standard soap:

- 700 ml purified water
- 270 grams of lye(dilute it in a large measuring bowl and stir with a wooden stick used for Chinese food)
- oils(mixed in a large container):
1) 1 liter of olive oil (use cheap olive oil, virgin is not suitable)
2) coconut oil (390 g or 500 ml)
3) grape seed oil (515 g or 500 ml)
Soap making at home
Heat the lye mixture and oils separately until 40 degrees Celsius. Then, after heating, very slowly pour the lye into the oil mixture. Next, lower the blender into the same container and mix the contents in short approaches for three minutes.

Instead of a blender, you can use a whisk, then the work will move forward slower and you will need to constantly scrape off the mass from the walls of the pan with a spatula. If you are seriously interested in making homemade soap, then it makes sense to use a separate, simplest blender for these purposes.
It also makes sense to purchase such a thing as a thermometer, a necessary device in the household, not only for making soap. But some lovers of homemade soap say that even without a thermometer they determine the desired degree of heat. To the touch.

At the end, add 10 ml of cinnamon oil. The less you add, the better. Theoretically, at this stage, the soap hardens very quickly.
Pour the resulting mixture into the prepared mold. Wrap the form with a warm blanket and leave for 24 hours. This will keep you warm and help the chemical reaction happen.
Skin care: from school to deep gray hairThe next day, cut it into manageable pieces, lay out on wrapping paper, and store in a cool place. After two weeks, turn the soap on the other side. You can start using after a month.

Making soap at home
However, if you are afraid to work with lye, or if you find it difficult to get it, then do not worry, There is another way to make your own soap. By making your own soap in this way, you will find a use for your old remnants that have been lying idle in the bathroom for a long time.
Such soap is called ground soap, because it consists of recycled residues of ordinary soap.
DIY homemade soap

What you need to make this soap:
- 3 bars of unscented regular white soap
- stainless steel or glass container
Water or coconut milk
small saucepan
Wooden spoon
Supplements (essential oils, herbs, colloidal oatmeal, lavender, etc.)
plastic molds
Making soap for beginners at home

1. Grate the soap in a stainless steel container. The result should be about 2 cups of grated soap.
2. Melt the soap. To do this, add half a glass of water or milk to the soap flakes (it will make the soap soft). The liquid should only slightly wet the soap, because if you overdo it, it will take longer to make.

Place the pot inside the larger pot of water to create a water bath. On low heat, gently stir the resulting mixture with a wooden spoon so that the soap does not stick to the bottom of the container. Be careful not to foam while stirring.
Do this until the soap is melted. If you feel like it's starting to dry out, just add some milk or water. The resulting mixture should be translucent and slightly rough.
Does antibacterial soap poison the water?3. Add other ingredients. Take the soap off the heat and add whatever ingredients you want in your soap, remembering to stir the mixture thoroughly. Soap recipes are huge, choose the one you like or create your own. You can add a few drops of your favorite perfume.

4. Pour soap into molds. You can use any plastic rectangular container or individual molds. In this case, you are only limited by your imagination.
5. Refrigerate the soap. After the soap has been in the molds for a few minutes, it should be placed in the freezer for 1 hour so that the soap can be easily removed from the mold.
6. After that, the soap should lie down approximately three weeks in a well-ventilated area. Once completely solidified, your soap is ready to use!
DIY soap for beginners
Soap Making: Important Soap Making Tips

1. Be sure to make sure that everything you need is at your fingertips before starting the procedure.
There is nothing worse than trying something new and then realizing in the middle of the process that something is missing.
In addition to the basic components that make up the recipe, you will need the following tools to "set up the soap station":
a) rubber gloves and goggles;

b) two large bowls made of a material that does not react with alkali (durable plastic, stainless steel, glass). Do not use utensils made of fragile plastic, aluminium, pewter or wood;
c) various measuring spoons for mixing. You need at least one heat-resistant plastic or stainless steel spoon to stir the lye, as well as a wooden spoon, whisk or rubber spatula to connect the elements;
Measuring spoons will come in handy if you plan to add essential oils to your soap;
d) measuring cup for liquids;
e) two thermometers to measure the temperature of your liquids;
e) molds for soap. It is best to use molds made of glass, plastic or stainless steel. Wooden and cardboard molds work well too, as long as you cover them with waxed paper.

g) paper towels to immediately wipe up anything that could suddenly spill. Especially if you are working with lye, a paper towel should always be on hand.
The list will vary depending on the type you make and the ingredients you add.
Shampoos and soaps ... lead to obesity2. Measure the exact amount of all ingredients
Whether you are making your soap entirely from scratch or making it from remnants, follow the guidelines strictly. prescription .
In some cases, inaccuracies in measurements can result in a stinky, unattractive soap batch.
Three guarantees against failure:

Accurate scales capable of measuring the smallest weights;
Alkaline calculator, available online, for example, this ;
Two accurate thermometers (to measure the temperature of lye/water and oils, which must be the same).
Various oils require different amount of alkali for saponification, so before you start, make sure you know soap index selected oils.
3. Learn more about the dangers of lye, or don't use it at all

One of the main ingredients of soap, as we already know, is a very caustic substance - sodium hydroxide or lye.
People have been making soap at home for centuries without incident, but it is a dangerous substance nonetheless. handling it requires a lot of attention and concentration.
Alkali in any form can wash off paint, eat through textiles, or worse, burn your skin or eyes.

To protect yourself from all dangers, be sure to wear long sleeves, rubber gloves, and goggles when making soap. The remains of raw materials are also dangerous, so even when getting rid of them, you must be as careful as possible.
If alkali gets on the skin, immediately use vinegar, to neutralize its effect, and if the alkali is spilled on any surface, then immediately wash it off with water and a cleaning agent.
7 beauty myths you shouldn't take seriouslyEven alkali vapors can burn, so work in a well-ventilated area. For those looking for easy and safer ways to make soap at home, there are options discussed above.
4. Try different soap making methods

The most interesting thing about making soap at home is that you can control the entire process.
You also have several options at your disposal when it comes to exactly how you will make your soap. You are not limited to the standard soap making process of adding lye/water to oils. This method is known as cold process.
Another method, not less popular, is hot process, in which alkali/water and oils are heated to a certain temperature and only then mixed.
The hot process of making soap will take you less time than the cold process.

Scared at the thought of having to use lye, or just want to make the process a play with the kids? Just melt the remnants or unscented soap and add the desired ingredients to it. This was also discussed above.
If you want to go the extra mile and turn your soap making process into a real one, try making liquid or felt soap.
5. Experiment with different recipes or create your own

When it comes to making soap from scratch, you can use animal oils like beef tallow, or vegetable/canola oil, or instead of water, use milk, tea or even beer.
In addition to the main ingredients, add all possible additives, these can be essential oils, and spices, and various herbs, and even decorative elements, such as rose petals and more.
Your best bet is to find a basic recipe you like and experiment with it.

Be sure to test the additives before using them, because some of them may not behave in the soap as you would like. For example, essential oils must be mixed with olive oil, which neutralizes the effect of their irritating components.
As soon as you get comfortable in this business, you will definitely come across the fact that one day you will get something completely different from what you wanted. Don't throw it away, recycle it by grating it and create something else, or cut it into small pieces and add bright spots to your new masterpieces.