Creation and editing of text documents means of work with text documents input, editing and formatting of texts. Creating and editing text documents Editing copying information in various editors
Lesson Objectives:
- introduce students to the basic steps for creating a document in the MS Word word processor;
- mastering the skills of document formatting.
Lesson objectives:
- educational : mastering students' knowledge about the basic concepts and actions of a word processor. Instilling the skills of creating, formatting and editing a text document.
- Educational : aimed at the formation of a creative personality, the development of memory, thinking, imagination, to teach to compare, generalize, draw conclusions.
- Educational : educates students in the ability to work in a team, the ability to listen to a teacher, respect for educational work, the formation of a culture of speech and confidence.
Lesson type: lesson-explanation of new material with practical elements
Lesson equipment: Interactive projector with whiteboard, computers, presentation-8-20, 8th grade textbook on computer science, PPR-8-20, lesson effectiveness card.
Requirements for knowledge and skills
Students should know:
- Technology for creating and editing text documents;
- ways to select the entire text or its fragments;
- formatting modes.
Students should be able to:
- Create text documents;
- save a text document;
- edit a text document;
- highlight a word, line, sentence, paragraph and the entire document;
- be able to format characters;
- set paragraph indents;
- align text or its fragments.
Lesson plan
- Organizing time
- Setting the topic and objectives of the lesson
- Checking the material covered, frontal survey
- Explanation of new material
- Consolidation of new material - Practical work
- grading, homework
- Lesson summary
DURING THE CLASSES
I. Organizational moment of the lesson:
Checking the readiness of the class for the lesson. class greeting. Checking the students present. A note in the class register of absent students.
II. Setting the topic and objectives of the lesson
(1-2 slides)- In the previous lessons, we began to get acquainted with the Microsoft Word word processor. We examined and compared the interfaces of Microsoft Word-2003 and Microsoft Word-2007, and also examined what a text editor is, what this program is for, how to launch the program, and the structure of the program window. Today you will learn how to create a document, edit, format text and save a document in MS Word. (Announce the topic of the lesson (which students should write in workbooks) - slide 1, and the objectives of the lesson - slide 2).
Before continuing to master the basic skills of working in this program, we will conduct a small frontal survey.
III. Checking the material covered, homework
Frontal survey on the topic: Representation of textual information. Word processor Microsoft Word.
- Word processor interface (slides - 3, 4, presentation 8-20)
- What is text? (Text is any sequence of characters from the computer alphabet.)
- What can be called a text document? (A text document is a file created using a text editor, which, in addition to alphanumeric characters, also contains graphic objects and control information about text formatting.)
- How can text information be processed? (Text information can be processed using a text editor or word processor.)
- What can you create with a text editor? (With the help of a text editor, you can create text documents on a magnetic disk, edit, change the document format, print, etc.)
Slides - 5, 6:
IV. Explanation of new material (Presentation-8-20 - slides - 7-12)
Creating a MS Word document:
To create a document, you need to perform the following basic steps:
- Choosing a font and its size
- Entering and editing text
- Text formatting
- Saving and opening a document
- Issuance for printing
Entering text in MS Word: When entering text in MS Word, you do not need to press the Enter key when entering a new line. When the typed text reaches the right edge of a paragraph, MS Word automatically breaks to a new line. However, if necessary. Any last word of the current line, or part of a word (if automatic wrapping is set) will be wrapped to a new line.
After finishing a paragraph, you need to press the Enter key to move to a new line of the next paragraph.
Text editing allows you to change an existing electronic document by adding, deleting or rearranging its fragments, merging several documents into one or splitting the document into several smaller ones.
Definition: Editing is a transformation that adds, removes, moves, or corrects the content of a document.
Editing is done by copying, moving or deleting selected characters or text fragments.
Copying or moving a character or piece of text can be done as follows:
I. Drag and drop method.
Algorithm:
- Select a piece of text.
- Holding down a key
and LMB to drag it to a new location.
II. Using the clipboard.
Algorithm:
- Select a piece of text.
- Edit - Cut.
- Move the cursor to a new location.
- Edit - Paste.
Formatting allows you to change appearance the document as a whole or parts of it. Appearance determines a lot. No wonder they say that "Meet - by clothes." This can be applied to documents as well. In addition to the fact that the document must be correct in content, it must be well designed.
Definition: Text formatting is the process of setting parameters for a piece of text that determine the appearance of the text in that piece.
Before changing the parameters, a piece of text must be selected. Document formatting is carried out in the course of the following actions:
- font design of the text;
- changing the parameters of the pages of the document;
- splitting the text into columns;
- designing the style of a character, paragraph, page.
Most of these actions can be implemented using the tools on the Format menu. Document formatting is based on creating new formats for text elements that must be previously selected.
Change font options.
To change character settings, use the Font command of the Format menu, which calls the Font dialog box.
Font dialog box (Figure 1)
The Font tab is used to set font options.
Formatting a paragraph of text. The paragraph ends with the Enter key. To set the parameters of a paragraph, use the Paragraph command from the Format menu. To set paragraph indents and intervals, select the Indents and Spacing tab.

Dialog box Paragraph (Figure 2.)
In field alignment sets the alignment of the paragraph:
- On the left side.
- In the center.
- On the right side.
- By width.
In the margins on the left and right, the distance from the left and right margins to the borders of the paragraph is set.
In field line spacing- spacing between lines within a paragraph:
- Single.
- One and a half.
- Double.
– Minimum.
- Multiplier.
V. Consolidation of new material
Implementation of a practical task.
Practical task:
- Launch MS Word word processor.
- Print the poem "Vegetables" using the Copy operation.
- Set margins (left-2.5; right-1.5; top and bottom by 2).
- Set paragraphs, set line spacing in the text equal to 2 points, justify alignment.
- Change font to Comic Sans MS, font size to 14 .

VI. Grading, homework
Checking the completed practical work, grading with comments.
VII. Lesson summary
Summing up the lesson:
- By rearranging the letters, you need to make a word related to the topic of the lesson.
- Explain the meaning of this concept.
- rpawak, feast,
- vkpraa, revytza,
- vkpraa, tavsvit.
Lesson effectiveness card.
Try to remember exactly what you heard in the lesson and answer the questions:
Full name, class _____________________________________________________________
- What was your goal in the lesson? _______________________________
- What previous knowledge did you draw on?
_____________________________________________________________________ - What new laws, ideas, formulas, rules did you learn in the lesson? ___________
- What is the main idea, conclusion of the lesson _______________________________________
- What grade would you give yourself, given the difference in the knowledge you acquired and the material given in the lesson?
Create and edit textual document

Lesson Objective: To teach students how to create and edit documents. Tasks: Tutorial: teach students how to design and edit documents. Checking knowledge on creating a document. Educational: upbringing information culture students, attentiveness, accuracy, discipline, perseverance. Educational: development of skills and abilities of working with a text document.

Text editors
Text editors are used to process text information on a computer. Text editors allow you to create, edit, format, save and print documents.
StarOffice Writer
Microsoft Office Publisher
Microsoft Front Page

Editing - a transformation that adds, removes, moves, or fixes document content. Editing a document is usually done by adding, deleting, or moving characters or pieces of text. Formatting - this is the layout of the text. In addition to text characters, formatted text contains special invisible codes that tell the program how to display it on the screen and print it on the printer: what font to use, what the style and size of the characters should be, how paragraphs and headings should be formatted. Formatted and unformatted text are somewhat different in nature. This difference must be understood.

Text input can be carried out in two modes: Insert mode; When you enter new text, the text contained in the document moves to the right of the cursor. Replace Mode; In replace mode, old text is removed and replaced with new text. To switch between these two modes, use the [ Insert ].


Moving cursor
To the beginning of the current line
To the end of the current line
Ctrl+Home
To the beginning of the document
Ctrl+End
To the end of the document
Page Down
Up one screen
Down one screen
Ctrl+Page Up
To the top of the screen
Ctrl+PageDown
To the bottom of the screen
ctrl + →
Right one word
Ctrl + ←
Left one word

Paperwork
- When it comes to decor text documents first of all, the use of various fonts is implied, in particular, the selection of headings and key concepts with their help.
- Font is a complete set of characters of a certain style. Each font has its own name, such as Times New Roman, Arial, Comic Sans MS. The font unit is a point (1 pt = 0.367 mm)( size - font size in points). Font sizes can be changed to a large extent. In addition to the normal (usual) character style, they usually use bold , cursive , bold italic .
- You can also set additional character formatting options: underline symbols various types lines, changing the appearance of symbols, changing the distances between symbols.
Format→Font

A paragraph from a literary point of view is a part of the text, which is a fragment of a work that is complete in meaning, the end of which serves as a natural pause for the transition to a new thought. In computer documents, a paragraph is any text that ends with an end-of-paragraph control character. Entering the end of a paragraph is provided by pressing the [ENTER]() key. The main paragraph formatting parameters are set using the Paragraph dialog box, which is called by the command Format→Paragraph .

Useful keyboard shortcuts:
alignment
left side
Ctrl+L
alignment
right side
ctrl+r
alignment
in the center
Ctrl+E
alignment
in width
Ctrl+J

Create Newspaper Columns
- Some types of information are best presented in the form of newspaper columns. In columns, text flows from the end of one column to the beginning of another.
- To work with columns you need design skills. Sometimes it's easier to enter text in one column (in the usual way) and then split it into multiple columns. To create and edit the structure of columns on a page, use the Columns window opened by the command Format→Columns .

Preview
- Although electronic means are increasingly being used to exchange information, it is not uncommon to have to print paper copies of documents as well.
- The document preview mode allows you to see how the text is divided into pages before printing, and identify possible problems, associated with markup.
- To open the preview window, click the Preview button on the Standard toolbar or select the File→Preview command.

Pasting objects
When designing text documents, the Word program allows you to add not only text elements or objects to the document - it has ample opportunities for inserting figures, diagrams, formulas, and so on into the text.

Inserting symbols
Documents often use characters that do not exist on the keyboard. Word allows you to enter many of the special characters either by pressing a key combination or by using the command
Insert→Symbol

Inserting math formulas
- The formula editor is a separate program that runs from Word. The formula is inserted using the Insert→Object command. In the dialog box, select Microsoft Equation 3.0.

Inserting a page number
Very often, when creating documents, it becomes necessary to number the pages. Doing this manually is useless, because Word has an easy way to do it automatically - insert pagination.
Inserting numbers
pages running
team
Insert→Page numbers .

Insert date and time
Word provides 16 formats that you can use when inserting current date and time values into a document.
Among them, for sure,
there is a format
which you need.
Insert→Date and Time

Inserting a picture
To insert pictures into a document, use the Insert→Picture command. Select the image source and paste it.
- Insert→Drawing→ Images
- Insert→Drawing→ From file
- Insert→Drawing→ An object word art

Paste a picture from the clipboard
- The clipboard is a special area of memory that all applications can access to write to and read from it. Buffering is called copying or cutting. Retrieving data from a buffer is called inserting. You can paste data from the buffer an unlimited number of times.
Cut
Copy
Ctrl + X
Insert
ctrl + FROM
Ctrl+V

Inserting a table
Table menu .


Practical work № 9
- Topic: "Creating documents, business cards
template-based cards.

Homework
- P. 3.2 - 3.3. pp. 77-84
- P. 3.2 - 3.3. pp. 77-84
Topic: "Creating, editing and fformatting of text documents.
Lesson Objectives:
Learning objective of the lesson: explore options for size, style, color, font alignment.
Developing goal of the lesson:to increase the level of knowledge of students when working with the program, to develop the skills of students as users of a personal computer.
Educational purpose of the lesson:to educate and improve the culture of the PC user.
know:
work with the program
work with text
format text
general presentation of the WordPad program
options for size, style, color, font alignment.
concept and terms
be able to:
During the classes
I . Organizing time.
II . Updating knowledge on the previous topic.
Survey. Protection of abstracts on the topic "WordPad", "Paint"..
III . Introduction of new material
Document Formatting
Text editors are programs for creating, editing, formatting, saving and printing documents. Modern document may contain, in addition to text, other objects (tables, diagrams, figures, etc.).
More advanced text editors that have a whole range of document creation capabilities (for example, search and symbols, spell checkers, insert tables, etc.) are sometimes called word processors. An example of such a program is Word from the Microsoft Office suite.
Powerful word processing programs - desktop publishing systems - designed to prepare documents for publication. An example of such a system is Adobe PageMaker.
Editing- a transformation that adds, deletes, moves or corrects the content of a document. Editing a document is usually done by adding, deleting, or moving characters or pieces of text.
The object-oriented approach makes it possible to implement the mechanism for embedding and embedding objects (OLE - Object Linking Embedding). This mechanism allows you to copy and paste objects from one application to another. For example, when working with a document in a Word text editor, you can embed images, animation, sound, and even video clips into it, and thus get a multimedia document from a regular text document.
Formatting- a transformation that changes the form of a document representation. At the beginning of working on a document, it is advisable to set the page parameters: its format (size), orientation, margin size, etc.
Paragraph formatting. A paragraph is one of the main objects of a text document. In computer documents, a paragraph is any text that ends with a control character (marker) for the end of a paragraph. Entering the end of a paragraph is provided by pressing the (Enter) key and is indicated by the ¶ symbol.
In the process of formatting a paragraph, its alignment parameters are set (alignment reflects the location of the text relative to the borders of the page margins), indents (the entire paragraph can have indents to the left and right) and intervals (the distance between the lines of the paragraph), the indent of the red line, etc.
Character formatting. Characters are letters, numbers, spaces, punctuation marks, special characters such as @, *, & . Symbols can be formatted (changed in appearance) by specifying the font, size, and style.
Font- a complete set of characters of a certain style, including uppercase and lowercase letters, punctuation marks, special characters, numbers and arithmetic signs. For each historical period and different countries characteristic font of a particular pattern. Each font has its own name, for example Times New Roman, Arial, Courier, etc.
Fonts are distinguished by the way they are represented on a computer. raster And vector. Raster graphics methods are used to represent bitmap fonts, font characters are groups of pixels. Bitmap fonts only allow scaling by certain factors.
In vector fonts, symbols are described by mathematical formulas and their arbitrary scaling is possible. Among vector fonts, fonts like true type.
Font size. The unit of measure for font size is a point (1 pt = 0.376 mm). Word uses 12 pt Times New Roman by default. The following are examples of how text is represented using fonts of various sizes:
Font size 14 pt.
Font size 10 pt.
Font size 6 pt.
inscription. In addition to the normal (usual) character style, they usually use bold, cursive And bold italic .
The file format determines how text is stored in the file. The simplest text file format (TXT) contains only characters (numeric character codes), while other formats (DOC, RTF) contain additional control codes that provide text formatting.
Create a new document
1 In the menu File select a team Create.
2 To create a new document, select the General and double click the icon new document».
To create a document using a template or wizard, select the tab for the type of document you want to create and double-click the icon for the template or wizard you want to use.
Saving a new document
3 Enter a document name in the File name.
If necessary, the file name can be quite long, consist of several words and serve as brief description document.
Saving an existing document
Closing a Document
Choose a team close on the menu File.
IV . Practical work.
Practical work "Creating a text document"
Objective:
Creating a text document and text formatting. Creating a document on the topic of the section.
Run the command sequence Start/All Programs/Microsoft Office
Notebook entry under item "1": The Microsoft Office package includes the following folders and programs ( all list separated by commas).
Run the command sequence Start/All Programs/Microsoft Office/Microsoft Office Tools
Entry in the notebook under paragraph "2": The Microsoft Office Tools package includes the following programs ( all list separated by commas).
Create a Microsoft Office Word document. Record in the notebook under paragraph "3" Step by step describe the procedure. describe ALL elements of the File panel according to the name-function principle.
Notebook entry under item "4" Describe ALL elements of the Edit panel by name-function principle.
Notebook entry under paragraph "5" Describe ALL elements of the View panel according to the name-function principle.
Notebook entry under paragraph "6" Describe ALL panel elements Insert by name-function principle.
Notebook entry under paragraph "7" Describe ALL panel elements Name-function format
Notebook entry under item "8" Describe ALL elements of the Service panel by name-function principle
V . Homework. General: abstract analysis, selective: essay on the topic "Creating a document", "Editing a document".
MODULE 2. MICROSOFT WORD XP TEXT EDITOR
LECTURE 1. CREATING AND EDITING A TEXT DOCUMENT
Firm Microsoft provides a software packageMicrosoft office , which includes the most used business programs of the company. Software package Microsoft Office not included inWindows . This means that it must be installed additionally. As a rule, if the software package Microsoft Office installed, the toolbar is displayed on the desktop Microsoft office.
Microsoft office XP comes in two versions: standard and professional. The package includes the following applications:
Microsoft excel XP – a table editor that allows you to create, design and calculate tables of any complexity.
Microsoft Word XP – modern text editor.
Microsoft PowerPoint XP – allows you to prepare materials for the presentation. The program uses information from other programs in the packageMicrosoft office .
Microsoft Outlook XP – an information system that provides storage and exchange of information with other network users.
Microsoft Access XP (Professional version only) – relational database.
Firm Microsoft created a software package based on the interaction of the applications included in the package. This allows you to create integrated documents based on data from various applications. The user makes the transition from one application to another, almost without noticing it. Package programs Microsoft Office numerous common features interface (method of communication).
Launching Word
To start Microsoft Word:
1. click on the button Start in the taskbar;
2. in the main menu that appears Windows hover over the line Programs;
3. In its menu, left-click on the line Microsoft Word. is running Word and a document is created, which by default is called Document1.
To create a document Word in the folder window, you need to open the menu File folder window, hover over the line Create and in its menu, left-click on the line Microsoft document Word. The same can be done by opening the context menu of the folder window by hovering over the item Create and in the next menu by clicking on the line Microsoft document Word. A file is created in the folder window, which by default is named Microsoft document Word. Double-clicking on its icon with the left mouse button or pressing theEnter, when the file is selected, open the file to work with it.
Word window
WindowWord consists of 2 parts - a program window and a document window into which you can enter text. The Word window contains various elements (Fig. 1).
 Fig 1. Elements of the Word window
Description of the elements of the Word window
| window element | Purpose |
| Workspace | Displays a document where you can enter text and edit it |
| Menu bar | This line displays the menu names (File, Edit, View, Insert, Format, Service, Table, Window, Help) that provide access to their commands |
| Toolbars | The toolbar buttons allow you to execute frequently used commands with a left-click. By default, two toolbars are active - Standard and Formatting. |
| Status bar | Here, Word shows information about the document and the state of the switches (the number of the page where the cursor is, the total number of pages in the document, the position of the cursor on the page, etc.) |
| Scroll bars | To move around the document without moving the cursor. You can navigate using the buttons along the borders of the scroll bars or by dragging the scroll bar slider while holding down the left mouse button. The scroll bar on the right side of the screen is for moving vertically, the bar above the status bar is for moving horizontally |
| Minimize button (in title bar) | Minimizes the Word window to the taskbar. To restore the Word window, click on the button with the document name on the taskbar. |
| Minimize/Maximize button (in title bar) | Click this button to make the Word window occupy a specific portion of the screen (you can resize the window)/full screen |
| Close button (in title bar) | Closes the Word window (exits the program). If the changes to the document have not been saved, the Save changes to document "Document name.doc"? with buttons Yes, No, Cancel. When you left-click on the Yes button, the changes in the document are saved, after which the Word window closes; when you click on the No button, the Word window closes without saving changes; clicking on the Cancel button returns to the document editing mode |
| Close window button (on the right in the menu bar) | Closes the active document window, leaving the Word window open |
Create a new document in the Word window
When Word is already running, you can create a new document by clicking on the button Create toolbar Standard , or on command Create menu File, or by pressing the key combination Ctrl+N .
Exiting the program
When you finish working in Word, you can close the program in several ways:
On the menu Fbut yil left click on command Output .
Press key combination Alt+F4 .
Click the button close in the title bar of the program window.
If the changes in the document have not been saved, Word will prompt you to save them before exiting the program. If you are not going to save changes to the document, just click on the button Not .
Saving a new document for the first time
When a document is created in Word, by default it is temporarily saved in random access memory computer named Document N , where N – a serial number starting from 1. This document is "saved" in memory until you exit the program or turn off the computer. In order to save a document forever, so that you can work with it in the future, you need to give it a name and save on disk.
1. Menu File select a team Save or click on the button Save standard toolbar, or press Ctrl+S. A dialog box will appear Preservation document .
2. Drop Folder click on the triangle button , select the desired disk, open the folder where we want to save the document.
3. In the text box Name file Enter the name you want to give your document. You can click on the triangle button to open a list of previously used names that can be used as a template for the name of this document. The extension and the dot before it are optional if the box Type file costs Document Word (*. doc) . The file name can be up to 255 characters and describes the content of the document.

Rice. 2. Dialog box Saving a document
Saving a document as you work
Once you've given the document a name and saved it, you still need to save it periodically. Once you have named a document, you can easily save it under the same name and in the same folder using one of the following methods.
Click on the menu File on command Save.
Press key combinationctrl+ S.
Word automatically uses the current document name, so the dialog box does not appear.
Saving a document under a different name
1. Menu File click command Save as. A dialog box will appear Saving a document, in which in the field File name the current document name will be presented.
2. In the field File name replace the file name with a new one.
3. Optional list Folder select a different drive and open a different folder to save the document in a different folder.
Opening a document in a Word window
To open any document created in Word to work with it, in the menu File left click on command Open or click on the button Open toolbar Standard. A dialog box will appear Opening a document(Fig. 4.3).

The file list shows all Word documents and subdirectories in the current folder. In field Folder the name of the current folder is displayed. In the dialog box, you can do the following:
Open a file by double-clicking on its icon in the file list or select the file and click on the button Open .
Find files that are not Word documents. To do this, from the drop-down list Type files: select the desired file type.
From drop down field Folder select the desired drive or folder.
Go to the folder one level up by clicking on the button Transition on the one level up .
Navigate to any folder by double-clicking on its icon in the folder list.
If you need to quickly open a document that you've recently worked on, see the list of recently used Word files. To view this list, open the menu File , - the list is at the end of the menu, right above the command Output . To open a file from the list, click on the desired file name.
You can set the number of files in this list and the appearance of the list in general:
1. Click on the menu Service on command Parameters - a dialog box will appear Parameters .
2. Click on the spine General and then check the option checkbox Remember list of... files to enable/disable listing on the screen. To change the number of files included in the list, enter their number in the field Remember list of... files or click the up/down arrow button to change the set amount.
3. Click the button OK .
Basics of editing. Entering text
When creating a new document Word template based normal. dot , the workspace is empty and contains one element - a blinking vertical line - cursor, or the insertion point, which marks the place in the document where text will be entered and where editing can be done.
To enter text, simply type it on the keyboard. As you type, the text will appear and the cursor will move to the right. If the line of text reaches the right edge of the window, Word will automatically start a new line, that is, it will wrap words. Don't press a key Enter until you want to start a new paragraph. If you type more lines than will fit in the window, Word will scroll the previously entered text up to keep the cursor in view.
If you made a mistake:
Press key backspace to delete characters to the left of the cursor
Press key Delete to delete characters to the right of the cursor
You can move the cursor to add and edit text anywhere in the document.
Basic cursor movement
To move the cursor:
one position left or right, one line up or down - press the key with the corresponding arrow on the keyboard;
to the beginning or end of the line - press keys Home or End ;
up or down to the height of the window client area - press the keys Page Up silt And Page Down ;
to the beginning or end of the document - holding down the key ctrl , click But m e or End .
Scrolling a document with the mouse
| Where to scroll the document | How to do it |
| Up or down one line | Click the up or down arrow button on the vertical scroll bar |
| Up or down one screen | Click on the vertical scroll bar between the slider and the up or down arrow button |
| Up or down any distance | Drag the vertical scroll bar up or down |
Text selection
Many tasks that you perform in Word require you to first select the text that you will be modifying. Text can be selected with the mouse or with the keyboard. When working with a mouse, use the selection bar - the area to the left of the left margin of the document. When the mouse cursor is positioned in the selection bar, it changes from an I-shape to an arrow pointing up and to the right.
Ways to select text
| What to highlight | How to do it |
| Mouse |
|
| Any text | Place the mouse cursor at the beginning of the text, press the left mouse button and, holding it down, drag the cursor through the text until the end of the text |
| One word | Double click on the word with the left mouse button |
| One offer | Press the Ctrl key and, while holding it down, click somewhere in the sentence with the left mouse button |
| one line | Left click in the selection bar next to the line |
| Multiple lines | By pressing the left mouse button, drag the cursor in the selection bar along the lines to be selected |
| One paragraph | Double-click in the selection bar next to a paragraph or 3 times in a paragraph |
| Several paragraphs | Highlight the first paragraph, press and hold ctrl , select the rest of the paragraphs |
| Whole Document | Press and hold the Ctrl key and click anywhere in the selection bar or 3 times in the selection bar |
| Using the keyboard |
|
| Any text block | Set the cursor to the beginning of the text block, press and hold the key |
| Whole Document | Press Ctrl+A |
To cancel the selection, click somewhere on the screen or move the cursor using the keyboard.
Delete, copy and cut text
To delete part of the text, first select it.
If you just want to delete the text - press the key Delete or backspace .
If, after deleting the text, you need to replace it with another one, type the new text.
To move or copy text, select it first.
1. To copy text, in the menu Edit click command Copy or click on the button Copy toolbar Standard , or click ctrl+c.
To move text, in the menu Edit click command Cut , or click the button Cut toolbar Standard or click Ctrl+X .
2. Place the cursor in the document where you want to move or copy the text.
3. Menu Edit click command Insert , or click the button Insert toolbar Standard or click Ctrl + V .
For displacement And copying small blocks text you can use the mouse.
1. Select the text;
2. Place the mouse cursor on this text. The shape of the pointer will change from I-shaped to an arrow, press and hold down the left mouse button;
3. To copy the text, press and hold the Ctrl key. Do not click to move text Ctrl .
4. Drag the cursor to a new location, then the text cursor (|) will show the new position of the text.
5. Release the mouse button and, if the text was copied, the Ctrl key l
Page settings
Page margins are white space near the edges of pages. Typically, text and graphics are inserted into the printable area, which is bounded by the margins of the page. However, some elements, such as headers, footers, and page numbers, can be placed in margins.
Change page margins
1. on the menu File click command Page settings , and then open the tab fields .
2. On the tab fields set the required parameters.
Page Orientation Selection
1. Select from the menu File command Page settings , and then open the tab fields .
2. In a group Orientation choose an option bookstore or landscape .
Font Formatting
Word offers a wide variety of fonts for use in documents. Each font has a specific headset, which determines the type of its characters. Headset can be identified by names such as Arial, Courier, Times New Roman. Each font also has a size, which is specified in paragraphs(A point is 1/72 inch, so a 36-point font is 1/2 inch high). Most documents use fonts that range from 8 to 14 points, but larger and smaller sizes are used in headings and other uses.
Font selection
To set the font for the text that we are just about to type, set the cursor to the beginning of the future text. You can quickly select a font and its size using the drop-down lists Font
And Size
on the toolbar Formatting
![]() . Listed Font
recently used fonts are at the top of the list.
. Listed Font
recently used fonts are at the top of the list.
To change the font of already typed text, first select this text.
You can also select a font and its options using the dialog box Font :
1. Menu Format click on command Font . A dialog box opens Font .
2. Listed Font names of existing fonts are presented. Scroll through the list and select the one you want.
3. Listed Size the size of the current font. Select a new size from the list, or enter a number in the text box by left-clicking it. In the window Sample the selected font will appear.
4. Click the button OK.

Rice. 4. Dialog box Font
Using italic, bold, and underline
Any Word font can be used with bold, italic, or underline styles. You can use two or three effects at the same time. To quickly set the desired style, click on the button on the toolbar Formatting . , and to turn it off, click it again. When the cursor enters the part of the document where one of these types of formatting is entered, the corresponding button on the panel changes to the pressed one.
You can set the style for the selected font using the dialog box Font . For this:
1. Select from the menu Format command Font to open a dialog box Font .
2. In the field inscription select Italics , Bold or Bold Italics . To return to the normal style, select Usual .
3. Drop underlining choose the underline style you want or select an option (No) to remove underlining.
4. Click the button OK .
Changing character spacing. Text offset
1. On the menu Format click on command Font. Open bookmark Interval.

2. Listed Interval choose sparse or compacted. in the window on the:
3. Click OK.
To shift the text up or down relative to the line, select the text in the listBias choose Up or Down and in the window for: indicate how many points.
Apply special effects to fonts
There are many special font effects in Word: superscripts, subscripts, strikethrough, shadow, outline, etc. In addition, you can hide text, which means that it will not be displayed on the screen and will not be printed. To apply these effects to selected text or text you are about to type:
1. Menu Format click on command Font .
2. On the bookmark Font in the region of Modification check the boxes you want, and to disable the effect, uncheck the corresponding box. In the region of Sample you will see the text with the selected effect.
MODULE 2. MICROSOFT WORD XP TEXT EDITOR
LECTURE 1. CREATING AND EDITING A TEXT DOCUMENT
Firm Microsoft provides a software packageMicrosoft office , which includes the most used business programs of the company. Software package Microsoft Office not included inWindows . This means that it must be installed additionally. As a rule, if the software package Microsoft Office installed, the toolbar is displayed on the desktop Microsoft office.
Microsoft office XP comes in two versions: standard and professional. The package includes the following applications:
Microsoft excel XP – a table editor that allows you to create, design and calculate tables of any complexity.
Microsoft Word XP – modern text editor.
Microsoft PowerPoint XP – allows you to prepare materials for the presentation. The program uses information from other programs in the packageMicrosoft office .
Microsoft Outlook XP – an information system that provides storage and exchange of information with other network users.
Microsoft Access XP (Professional version only) – relational database.
Firm Microsoft created a software package based on the interaction of the applications included in the package. This allows you to create integrated documents based on data from various applications. The user makes the transition from one application to another, almost without noticing it. Package programs Microsoft Office characterized by numerous common features of the interface (method of communication).
Launching Word
To start Microsoft Word:
1. click on the button Start in the taskbar;
2. in the main menu that appears Windows hover over the line Programs;
3. In its menu, left-click on the line Microsoft Word. is running Word and a document is created, which by default is called Document1.
To create a document Word in the folder window, you need to open the menu File folder window, hover over the line Create and in its menu, left-click on the line Microsoft document Word. The same can be done by opening the context menu of the folder window by hovering over the item Create and in the next menu by clicking on the line Microsoft document Word. A file is created in the folder window, which by default is named Microsoft document Word. Double-clicking on its icon with the left mouse button or pressing theEnter, when the file is selected, open the file to work with it.
Word window
WindowWord consists of 2 parts - a program window and a document window into which you can enter text. The Word window contains various elements (Fig. 1).
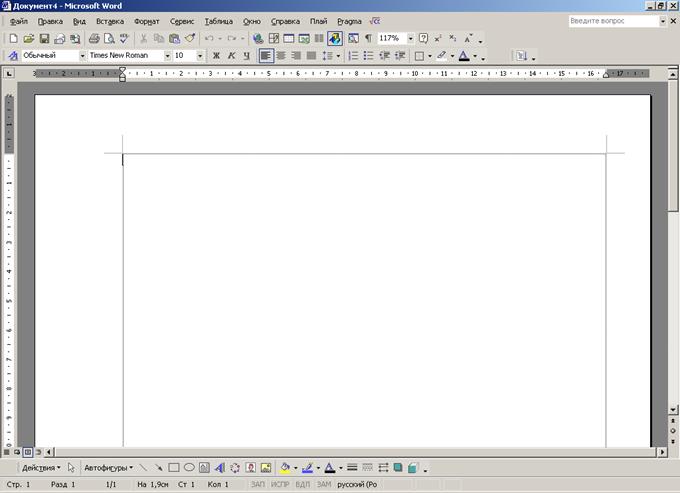 Fig 1. Elements of the Word window
Description of the elements of the Word window
| window element | Purpose |
| Workspace | Displays a document where you can enter text and edit it |
| Menu bar | This line displays the menu names (File, Edit, View, Insert, Format, Service, Table, Window, Help) that provide access to their commands |
| Toolbars | The toolbar buttons allow you to execute frequently used commands with a left-click. By default, two toolbars are active - Standard and Formatting. |
| Status bar | Here, Word shows information about the document and the state of the switches (the number of the page where the cursor is, the total number of pages in the document, the position of the cursor on the page, etc.) |
| Scroll bars | To move around the document without moving the cursor. You can navigate using the buttons along the borders of the scroll bars or by dragging the scroll bar slider while holding down the left mouse button. The scroll bar on the right side of the screen is for moving vertically, the bar above the status bar is for moving horizontally |
| Minimize button (in title bar) | Minimizes the Word window to the taskbar. To restore the Word window, click on the button with the document name on the taskbar. |
| Minimize/Maximize button (in title bar) | Click this button to make the Word window occupy a specific portion of the screen (you can resize the window)/full screen |
| Close button (in title bar) | Closes the Word window (exits the program). If the changes to the document have not been saved, the Save changes to document "Document name.doc"? with buttons Yes, No, Cancel. When you left-click on the Yes button, the changes in the document are saved, after which the Word window closes; when you click on the No button, the Word window closes without saving changes; clicking on the Cancel button returns to the document editing mode |
| Close window button (on the right in the menu bar) | Closes the active document window, leaving the Word window open |
Create a new document in the Word window
When Word is already running, you can create a new document by clicking on the button Create toolbar Standard , or on command Create menu File, or by pressing the key combination Ctrl+N .
Exiting the program
When you finish working in Word, you can close the program in several ways:
On the menu Fbut yil left click on command Output .
Press key combination Alt+F4 .
Click the button close in the title bar of the program window.
If the changes in the document have not been saved, Word will prompt you to save them before exiting the program. If you are not going to save changes to the document, just click on the button Not .
Saving a new document for the first time
When a document is created in Word, by default it is temporarily saved in the computer's RAM under the name Document N , where N – a serial number starting from 1. This document is "saved" in memory until you exit the program or turn off the computer. In order to save a document forever, so that you can work with it in the future, you need to give it a name and save on disk.
1. Menu File select a team Save or click on the button Save standard toolbar, or press Ctrl+S. A dialog box will appear Preservation document .
2. Drop Folder click on the triangle button , select the desired disk, open the folder where we want to save the document.
3. In the text box Name file Enter the name you want to give your document. You can click on the triangle button to open a list of previously used names that can be used as a template for the name of this document. The extension and the dot before it are optional if the box Type file costs Document Word (*. doc) . The file name can be up to 255 characters and describes the content of the document.

Rice. 2. Dialog box Saving a document
Saving a document as you work
Once you've given the document a name and saved it, you still need to save it periodically. Once you have named a document, you can easily save it under the same name and in the same folder using one of the following methods.
Click on the menu File on command Save.
Press key combinationctrl+ S.
Word automatically uses the current document name, so the dialog box does not appear.
Saving a document under a different name
1. Menu File click command Save as. A dialog box will appear Saving a document, in which in the field File name the current document name will be presented.
2. In the field File name replace the file name with a new one.
3. Optional list Folder select a different drive and open a different folder to save the document in a different folder.
Opening a document in a Word window
To open any document created in Word to work with it, in the menu File left click on command Open or click on the button Open toolbar Standard. A dialog box will appear Opening a document(Fig. 4.3).

The file list shows all Word documents and subdirectories in the current folder. In field Folder the name of the current folder is displayed. In the dialog box, you can do the following:
Open a file by double-clicking on its icon in the file list or select the file and click on the button Open .
Find files that are not Word documents. To do this, from the drop-down list Type files: select the desired file type.
From drop down field Folder select the desired drive or folder.
Go to the folder one level up by clicking on the button Transition on the one level up .
Navigate to any folder by double-clicking on its icon in the folder list.
If you need to quickly open a document that you've recently worked on, see the list of recently used Word files. To view this list, open the menu File , - the list is at the end of the menu, right above the command Output . To open a file from the list, click on the desired file name.
You can set the number of files in this list and the appearance of the list in general:
1. Click on the menu Service on command Parameters - a dialog box will appear Parameters .
2. Click on the spine General and then check the option checkbox Remember list of... files to enable/disable listing on the screen. To change the number of files included in the list, enter their number in the field Remember list of... files or click the up/down arrow button to change the set amount.
3. Click the button OK .
Basics of editing. Entering text
When creating a new document Word template based normal. dot , the workspace is empty and contains one element - a blinking vertical line - cursor, or the insertion point, which marks the place in the document where text will be entered and where editing can be done.
To enter text, simply type it on the keyboard. As you type, the text will appear and the cursor will move to the right. If the line of text reaches the right edge of the window, Word will automatically start a new line, that is, it will wrap words. Don't press a key Enter until you want to start a new paragraph. If you type more lines than will fit in the window, Word will scroll the previously entered text up to keep the cursor in view.
If you made a mistake:
Press key backspace to delete characters to the left of the cursor
Press key Delete to delete characters to the right of the cursor
You can move the cursor to add and edit text anywhere in the document.
Basic cursor movement
To move the cursor:
one position left or right, one line up or down - press the key with the corresponding arrow on the keyboard;
to the beginning or end of the line - press keys Home or End ;
up or down to the height of the window client area - press the keys Page Up silt And Page Down ;
to the beginning or end of the document - holding down the key ctrl , click But m e or End .
Scrolling a document with the mouse
| Where to scroll the document | How to do it |
| Up or down one line | Click the up or down arrow button on the vertical scroll bar |
| Up or down one screen | Click on the vertical scroll bar between the slider and the up or down arrow button |
| Up or down any distance | Drag the vertical scroll bar up or down |
Text selection
Many tasks that you perform in Word require you to first select the text that you will be modifying. Text can be selected with the mouse or with the keyboard. When working with a mouse, use the selection bar - the area to the left of the left margin of the document. When the mouse cursor is positioned in the selection bar, it changes from an I-shape to an arrow pointing up and to the right.
Ways to select text
| What to highlight | How to do it |
| Mouse |
|
| Any text | Place the mouse cursor at the beginning of the text, press the left mouse button and, holding it down, drag the cursor through the text until the end of the text |
| One word | Double click on the word with the left mouse button |
| One offer | Press the Ctrl key and, while holding it down, click somewhere in the sentence with the left mouse button |
| one line | Left click in the selection bar next to the line |
| Multiple lines | By pressing the left mouse button, drag the cursor in the selection bar along the lines to be selected |
| One paragraph | Double-click in the selection bar next to a paragraph or 3 times in a paragraph |
| Several paragraphs | Highlight the first paragraph, press and hold ctrl , select the rest of the paragraphs |
| Whole Document | Press and hold the Ctrl key and click anywhere in the selection bar or 3 times in the selection bar |
| Using the keyboard |
|
| Any text block | Set the cursor to the beginning of the text block, press and hold the key |
| Whole Document | Press Ctrl+A |
To cancel the selection, click somewhere on the screen or move the cursor using the keyboard.
Delete, copy and cut text
To delete part of the text, first select it.
If you just want to delete the text - press the key Delete or backspace .
If, after deleting the text, you need to replace it with another one, type the new text.
To move or copy text, select it first.
1. To copy text, in the menu Edit click command Copy or click on the button Copy toolbar Standard , or click ctrl+c.
To move text, in the menu Edit click command Cut , or click the button Cut toolbar Standard or click Ctrl+X .
2. Place the cursor in the document where you want to move or copy the text.
3. Menu Edit click command Insert , or click the button Insert toolbar Standard or click Ctrl + V .
For displacement And copying small blocks text you can use the mouse.
1. Select the text;
2. Place the mouse cursor on this text. The shape of the pointer will change from I-shaped to an arrow, press and hold down the left mouse button;
3. To copy the text, press and hold the Ctrl key. Do not click to move text Ctrl .
4. Drag the cursor to a new location, then the text cursor (|) will show the new position of the text.
5. Release the mouse button and, if the text was copied, the Ctrl key l
Page settings
Page margins are white space near the edges of pages. Typically, text and graphics are inserted into the printable area, which is bounded by the margins of the page. However, some elements, such as headers, footers, and page numbers, can be placed in margins.
Change page margins
1. on the menu File click command Page settings , and then open the tab fields .
2. On the tab fields set the required parameters.
Page Orientation Selection
1. Select from the menu File command Page settings , and then open the tab fields .
2. In a group Orientation choose an option bookstore or landscape .
Font Formatting
Word offers a wide variety of fonts for use in documents. Each font has a specific headset, which determines the type of its characters. Headset can be identified by names such as Arial, Courier, Times New Roman. Each font also has a size, which is specified in paragraphs(A point is 1/72 inch, so a 36-point font is 1/2 inch high). Most documents use fonts that range from 8 to 14 points, but larger and smaller sizes are used in headings and other uses.
Font selection
To set the font for the text that we are just about to type, set the cursor to the beginning of the future text. You can quickly select a font and its size using the drop-down lists Font
And Size
on the toolbar Formatting
![]() . Listed Font
recently used fonts are at the top of the list.
. Listed Font
recently used fonts are at the top of the list.
To change the font of already typed text, first select this text.
You can also select a font and its options using the dialog box Font :
1. Menu Format click on command Font . A dialog box opens Font .
2. Listed Font names of existing fonts are presented. Scroll through the list and select the one you want.
3. Listed Size the size of the current font. Select a new size from the list, or enter a number in the text box by left-clicking it. In the window Sample the selected font will appear.
4. Click the button OK.

Rice. 4. Dialog box Font
Using italic, bold, and underline
Any Word font can be used with bold, italic, or underline styles. You can use two or three effects at the same time. To quickly set the desired style, click on the button on the toolbar Formatting . , and to turn it off, click it again. When the cursor enters the part of the document where one of these types of formatting is entered, the corresponding button on the panel changes to the pressed one.
You can set the style for the selected font using the dialog box Font . For this:
1. Select from the menu Format command Font to open a dialog box Font .
2. In the field inscription select Italics , Bold or Bold Italics . To return to the normal style, select Usual .
3. Drop underlining choose the underline style you want or select an option (No) to remove underlining.
4. Click the button OK .
Changing character spacing. Text offset
1. On the menu Format click on command Font. Open bookmark Interval.

2. Listed Interval choose sparse or compacted. in the window on the:
3. Click OK.
To shift the text up or down relative to the line, select the text in the listBias choose Up or Down and in the window for: indicate how many points.
Apply special effects to fonts
There are many special font effects in Word: superscripts, subscripts, strikethrough, shadow, outline, etc. In addition, you can hide text, which means that it will not be displayed on the screen and will not be printed. To apply these effects to selected text or text you are about to type:
1. Menu Format click on command Font .
2. On the bookmark Font in the region of Modification check the boxes you want, and to disable the effect, uncheck the corresponding box. In the region of Sample you will see the text with the selected effect.