Creative project on the topic: "Making a metal scoop." Recommendations for carrying out independent extracurricular work for students, educational and methodological material on the topic: Justification of the problem that has arisen
Methodological recommendations for students on carrying out independent extracurricular work are compiled in accordance with the requirements of the Federal State Educational Standard for Secondary Professional Education in the specialty "Pharmacy" and contain a list of recommendations for organizing independent extracurricular work for 2nd year students in the interdisciplinary course 02.01 Technology of manufacturing dosage forms when studying the section "Introduction to Technology" dosage forms. Powders."
Download:
Preview:
Professional educational organization
"Amur Medical College"
for students to complete independent extracurricular work
Topic: “Introduction to the technology of dosage forms. Powders"
MDK 02.01. Manufacturing technology of dosage forms
Specialty: 02/33/01 Pharmacy
Course: 2
Level of training: basic
Blagoveshchensk
2018
Reviewed APPROVED
at the meeting of the Central Medical Committee "Pharmacy" Expert Council of the State Autonomous Institution JSC VET
Protocol No. _____ "Amur Medical College"
"__" ______ 20 __ Minutes No. _____
Chairman of the Central Committee __________ dated “____” ________ 20 __
Davydova O.A.
Methodological recommendations for students on carrying out independent extracurricular work are compiled in accordance with the requirements of the Federal State Educational Standard for Secondary Professional Education in the specialty “Pharmacy” and contain a list of recommendations for organizing independent extracurricular work for students in the interdisciplinary course 02.01 Technology of manufacturing dosage forms.
Compiled by: Sukhova Lyudmila Pavlovna, teacher of State Autonomous Institution JSC POO "AMK"
Explanatory note…………………………………………………… 4 pages.
Self-study map…………………………………………… 5 pages.
Section 1. General part:
Topic 1.1. Technology for manufacturing dosage forms as a science……6 p.
Topic 1.2. Dosing in the technology of dosage forms………………7 p.
Topic 1.3. State regulation of the quality of medicines
funds…………………………………………………………………………………. 8 pages
Section 2. Powders:
Topic 2.1. Production of simple and complex powders…………………10 p.
Topic 2.2. Production of powders with potent drugs……………………………………………………………….12 p.
Topic 2.3. Production of powders with poisonous and narcotic drugs………………………………………………………….14 p.
Topic 2.4. Production of powders with various medicinal products
means………………………………………………………………………………….16 p.
Topic 2.5. General lesson “Production of powders” ……………18 p.
Literature……………………………………………………………….21 pp.
Appendices…………………………………………………………...22 pages.
EXPLANATORY NOTE
The preparation of a specialist involves the development of certain skills in educational and cognitive activity, as well as self-education skills that will be useful to him in the future.
First of all, for independent work, a student must be able to find the necessary literature and navigate educational and periodical printed information. Tasks for independent work will help with this, such as preparing a message, completing an essay, solving typical professional problems, in preparation for practical and theoretical classes.
Students' performance of independent extracurricular work is a requirement of the Federal State Educational Standard, a mandatory element of the work program for MDK Technology of manufacturing dosage forms with the methodological guidance of the teacher, but without his direct participation.
The purpose of methodological recommendations is to assist the student in mastering the educational material. Methodological recommendations contain various forms of independent work for mastering knowledge, for deepening and consolidating it, developing certain skills, goals and content of tasks, forms of reporting and control, evaluation criteria.
Various types of independent work are performed in accordance with the topic of the lesson. In these recommendations, each type of independent work includes questions and recommended literature. To complete independent work, it is necessary to use recommended literature, Internet resources or other sources at the student’s discretion.
General criteria for evaluating work:
1. Completeness and correctness of the answer
2. Degree of awareness and understanding of what has been learned
3. Language design
Systematic implementation of independent work develops in the student observation, independence, responsibility, the ability to analyze, generalize, highlight the main thing in the material being studied, take a creative approach to performing certain tasks, and improves the quality of knowledge.
The total number of hours allocated for studying MDK 02.01. The technology for manufacturing dosage forms is 328 hours, of which 164 hours are for students’ independent work.
SELF-WORK CARD
Topic name | Type of independent extracurricular work | form of control | Time spent on task completion |
Section 1. General part |
|||
1. Preparation of abstracts 2. Create a presentation 3. Essay 4. Compiling a table based on the lecture notes | oral oral oral written oral | 4 hours 2 hours 3 hours 1 hour 1 hour |
|
1. Drawing up an algorithm for weighing and measuring substances 2. Preparing for testing 3. Preparation for the oral interview | written Written Oral | 1 hour 1 hour |
|
1. Taking notes 2. Compiling tables 3. Essay 4. Preparation for testing 5. Preparation for the oral interview | written written oral written oral | 2 hours 2 hours 3 hours 1 hour 1 hour |
|
Section 2. Powders |
|||
3. Preparing for testing | written oral written | 1 hour 1 hour 1 hour |
|
1. Solving problems according to individual instructions 2. Preparation for the oral interview 3. Preparing for testing | written oral written | 1 hour 1 hour 1 hour |
|
1. Solving problems according to individual instructions 2. Preparation for the oral interview 3. Preparing for testing | written oral written | 1 hour 1 hour 1 hour |
|
1. Solving problems according to individual instructions 2. Preparation for the oral interview 3. Preparing for testing 4. Preparing the message | written oral written oral | 1 hour 1 hour 1 hour 1 hour |
|
Preparing for a general lesson | written, oral | 4 hours |
|
Total 40 hours |
|||
Section 1. General part
Topic 1.1. Technology of manufacturing dosage forms as a science
The purpose of self-study is to expand knowledge about the history of the development of dosage form technology.
Tasks:
- deepening and expanding knowledge about the technology of manufacturing dosage forms and the need to study it for a future profession
Formation of skills in working with educational and additional literature
Development of cognitive abilities, responsibility
The student must know:
Theoretical foundations of the technology for manufacturing dosage forms
Basic terms and concepts of technology for manufacturing dosage forms
The student must be able to:
Work independently with reference and scientific literature
Formulate definitions of basic terms and concepts
Task 1. Preparation of an abstract on the topic:
1.1. "History of the development of dosage forms."
1.2. “The contribution of domestic scientists to the development of pharmacy.”
1.3. "Dosage forms of the 19th century."
Completion time per topic- 4 hours
form of control – oral (individual interview, listening to a practical lesson)
Task 2. Creating a presentation“Design and equipment of the first Russian pharmacies”
Job completion time: 2 hours
form of control – oral (in a practical lesson)
Task 3. Essay “The relationship between pharmacy and industrial production of drugs”
Lead time: 3 hours
form of control – listening to a practical lesson
Task 4. Compiling a table“Basic terms of dosage form technology”
Recommendations for creating a table: You must write the name of the table. In the table, write down the main terms used in the technology of dosage forms and their definitions (pharmacological product, medicinal substance, medicinal product, dosage form, medicinal product).
lead time- 1 hour.
Evaluation criteria: Appendix D
form of control – written report (table)
Questions for preparation:
1. What is the technology for manufacturing dosage forms, what does it do?
2. What are the main objectives of dosage form technology?
3. What is the classification of dosage forms by state of aggregation, use, dosage?
4. Define the terms “pharmacological agent”, “medicinal substance”, “drug”, “dosage form”, “drug”.
lead time- 1 hour
form of control – oral questioning during a theoretical lesson
Topic 1.2. Dosing in dosage form technology
Purpose of self-study – study the topic “Dosing in the technology of dosage forms. Packaging and closing means"
Tasks:
Study the means for weighing and measuring medicines and the rules for working with them
Develop cognitive interest
The student must know:
Methods of dosing of medicinal substances
Measuring instruments for dosing medicinal substances
Packaging and capping means for dosage forms
The student must be able to:
Select means for packaging and capping medicines
Use measuring instruments
Tasks for student independent work:
Task 1. Drawing up manipulation algorithms:
Drawing up an algorithm for weighing a powdery substance using manual scales.
Drawing up an algorithm for weighing a liquid substance on technical scales.
Drawing up an algorithm for measuring a liquid substance using a cylinder.
Carefully study educational and reference literature. Select the main material. Draw up an algorithm for weighing/measuring a substance, which should contain clear instructions for performing sequential manipulations (preparation of equipment, rules for using scales or measuring utensils, rules for weighing/measuring a substance).
Evaluation criteria:
5 points – the task is completed, the content and sequence of manipulations meet the technological requirements, the work is completed competently and accurately
4 points – task completed, careless design or grammatical errors were made
3 points – task completed, errors were made in the sequence and content of manipulations
2 points – task not completed or completed incorrectly
lead time– 1 hour
form of control – written report
Task 2. Preparing for testing
1. The ability of scales to show the same results during repeated determinations of body weight under the same conditions is called a metrological property:
A) stability
B) sensitivity
B) loyalty
D) constancy of readings
2. Hand scales are wiped with liquid:
A) alcohol-ether mixture
B) alcohol
B) water
3. One milliliter of water measured by a standard drop meter contains the number of drops:
A) 10
B) 20
B) 30
A) 0.05 grams
B) 0.01 grams
B) 0.02 grams
5. When preparing dosage forms, liquid is dosed by weight:
A) purified water
B) tincture
B) oil
lead time- 1 hour
form of control
Task 3. Preparing for an oral interview
Questions for preparation:
1. What dosing methods are used in the technology of manufacturing dosage forms?
2. What does dosing by weight mean and what means are used for this?
3. On what factors does the accuracy of dosing by weight depend?
4. What metrological properties should scales have?
5. What are manual pharmacy scales used for?
6. What does dosing by volume mean and what means are used for this?
7. What factors determine the accuracy of volume dosing?
8. What are the rules for measuring liquids?
9. In what cases and with what help is drop dosing carried out?
10. What is a standard droplet meter?
lead time- 1 hour
form of control
Topic 1.3. State regulation of the quality of medicines
The purpose of self-training is to deepen and consolidate knowledge on standardization of the quality of medicines and drugs
Tasks:
Study the regulatory and technical documentation regulating the quality of medicines and forms
Develop logical thinking and cognitive interest
Cultivate care and responsibility
The student must know:
Basic terms and concepts of dosage form technology
Main directions of state regulation of the quality of medicines and their storage
Rules for writing prescriptions and their structure
Rules for packaging and registration of dosage forms
The student must be able to:
Formulate the basic terms and concepts of dosage form technology
Use the Global Fund and other normative documents to find the necessary information
Select means of packaging, closure and design of the dosage form
Tasks for student independent work:
Task 1. Drawing up a summary “Forms of prescription forms and rules for their execution”
Tips for writing notes: Study the order of the Ministry of Health of the Russian Federation No. 1175n “On approval of the procedure for prescribing and prescribing medications, as well as forms of prescription forms for medications, the procedure for processing these forms, their recording and storage.” The outline must indicate the forms of prescription forms, their use when writing prescriptions for individual production of dosage forms, the necessary data that must be indicated on a specific form.
lead time- 2 hours
Evaluation criteria:
Literacy of presentation – 1 point
Accuracy - 1 point
Meeting the deadline – 1 point
form of control – written (synopsis)
Task 2.
2.1. Drawing up a summary table “Validity and storage periods of recipes”
Recommendations for creating a table:Carefully study the order of the Ministry of Health of the Russian Federation No. 1175n. Write down the name of the table. In the table, indicate the form of the prescription form, its validity period from the date of prescription, and the shelf life in the pharmacy.
lead time- 2 hours
Evaluation criteria: Appendix G
form of control – written (table)
2.2. Drawing up a summary table “Main and additional labels”
Recommendations for compiling the table and evaluation criteria:In the table, indicate the types of main and additional labels, their signal color, application depending on the type of dosage form (Appendix D).
lead time- 2 hours
form of control – written (table)
Task 3. Essay "The Emergence of Pharmacopoeias"
lead time- 3 hours
form of control – oral (report on a practical lesson)
Task 4. Preparing for testing
Sample test (choose the correct answer):
1. Regulatory and technical documentation that regulates the quality of medicines and forms includes:
A) GF
B) Orders of the Ministry of Health of the Russian Federation
B) Recipe
D) That's right
2. The pharmacy label for internal use has a signal color:
A) green
B) orange
B) blue
D) pink
3. A medicine in the form of a specific dosage form is called:
A) medicinal substance
B) pharmacological agent
B) medicine
D) medicine
4. The following bottles are used for dispensing injection solutions:
A) alkali glass
B) neutral glass brand NS-1
B) perfume bottles
5. The following bottles are used for dispensing photosensitive drugs:
A) neutral glass
B) dark glass
B) alkali glass
Lead time: 1 hour
form of control – testing in a practical lesson
Task 5. Preparing for an oral interview
Questions for preparation:
1. What regulatory and technical documentation regulates the quality of medicines and dosage forms? List the main orders of the Ministry of Health of the Russian Federation.
2. What is the State Pharmacopoeia?
3. What is a prescription and what are the rules for writing it?
4. How should a doctor’s request to a pharmacist be formalized?
5. What are the expiration dates for prescriptions?
6. What are the rules for storing and working with substances sp. A and sp.B?
7. What should a pharmacist do if the prescription contains an overestimated dose of the substance sp. A or sp.B?
8. What are the rules for registration of dosage forms manufactured in pharmacies?
9. What products are used for packaging and capping medicines?
10. What indicators are taken into account when monitoring the quality of finished medicinal products?
Lead time: 1 hour
form of control – oral questioning during a practical lesson
Topic 2.1. Production of simple and complex powders
The purpose of self-preparation is to study the topic “Production of simple and complex powders”
Tasks:
Develop skills in making simple and complex powders
The student must know:
Methods for writing prescriptions for powders
Theoretical foundations of the process of grinding and mixing medicinal substances in powders
Devices for weighing and dosing powders
The student must be able to:
Use educational and reference literature
Evaluate the accuracy of prescriptions
Tasks for student independent work:
Exercise 1.
- Solving a situational problem.
Prescribe by distribution method complex powder No. 60, which consists of glucose in an amount of three deci and ascorbic acid in an amount of one deci. Make the necessary calculations for preparing powders.
1.2. Solving problems according to individual instructions
The pharmacy received a prescription for the production of powders according to the following recipe:
Rp: Acidi ascorbinici 0.1
Glucosi 0.2
M.f.p.
D.t.d. No. 20
S. 1 powder 2 times a day for a child 8 years old
Select the sequence of mixing medicinal substances
Select means of packaging and design of the dosage form
Running time: 1 hour
Evaluation criteria:
Recipe written correctly – 1 point
Lead time: 1 hour
Form of control:
Questions for preparation:
1.What are powders as a dosage form?
2. What are the advantages and disadvantages of powders as a dosage form?
3. What requirements does NTD impose on powders?
4. How are powders classified according to composition, method of application and dosage?
5. What is the distribution method for prescribing powders?
6. What is the separation method for prescribing powders?
7. What are the main stages in the production of powders?
8. In what cases, when prescribing a simple powder, can the medicinal substance not be crushed additionally?
9. In what cases, when prescribing a simple powder, is the medicinal substance necessarily crushed?
10. What substance does the grinding begin with to grind the pores of the mortar?
11. What are the rules for mixing medicinal substances in powders prescribed in equal or approximately equal quantities?
12. What are the rules for mixing medicinal substances in powders prescribed in different quantities?
13. How do you dispense powders?
14. How are simple and complex powders packaged?
15. What are the rules for preparing powders for release?
16. How is the quality of finished powders assessed?
Lead time: 1 hour
form of control – oral questioning during a practical lesson
Sample test (choose the correct answer):
1. The advantage of powders as a dosage form is (2 correct answers):
A) the possibility of administration to a patient in an unconscious state
B) ease of manufacture
C) change in properties during storage
D) portability
D) the possibility of irritating the oral mucosa
2. Complete the sentence: The main property of powders is ______
3. The uniformity of powders is determined by:
A) magnifying glass
B) microscope
B) with the naked eye
4. To select a mortar, you need to determine:
A) the mass of the drug substance for all doses
B) total mass of powders
C) the mass of one dose
5. After grinding the pores with a mortar, the substances are mixed in the order:
A) from smallest to largest
B) from highest to lowest
B) prescribed in the recipe
6. Additionally, the substance is crushed into simple powders:
A) coarse crystalline
B) easy to spray
C) easily soluble in the gastrointestinal tract
Lead time: 1 hour
form of control – testing in a practical lesson
Topic 2.2. Production of powders with potent drugs
The purpose of self-training is to deepen and expand knowledge on the production of powders
Tasks:
Study the topic “Manufacture of powders with potent drugs”
Develop skills in making powders with potent substances
Develop logical thinking
Foster a sense of responsibility and professionalism
The student must know:
Rules for storing potent substances and working with them
Rules for introducing potent substances into complex powders
Rules for packaging and design of powders
The student must be able to:
Check doses of potent substances
Calculate quantities of medicinal substances
Select and justify the technology for manufacturing the dosage form
Prepare dosage forms for release
Assignments for independent work of students
Rp: Phenobarbitali 0.02
Papaverini hydrochloride 0.03
Glucosi 0.25
M.f.p.
D.t.d. No. 10
Determine single and daily doses of phenobarbital and papaverine hydrochloride (sp.B)
Find the total mass of powders and weight (mass of one powder)
Evaluation criteria:
Calculations of quantities of substances were made correctly – 1 point
Correctly calculated mass of one powder – 1 point
Correctly chosen sequence of mixing substances – 1 point
Correctly selected packaging and design means 1 point
Maximum points – 5
lead time: 1 hour
Form of control: written (individual report, survey during a practical lesson)
Task 2. Preparing for an oral interview
Questions for preparation:
1. What are the substances sp. B?
2. What are the rules for storing list B substances?
3. What are the rules for working with list B substances?
4. What should a pharmacist pay attention to when filling a prescription that contains a potent substance?
5. What does the distribution method of prescribing powders mean?
6. What should a pharmacist do if the dose of a potent substance is too high?
7. What are the rules for introducing potent substances into complex powders?
8. What are the rules for the design of powders containing potent substances?
9. How is the quality of powders assessed?
lead time: 1 hour
form of control
Task 3. Preparing for testing
Sample test (choose the correct answer):
1. If the doctor has overestimated the single dose of a potent substance and documented this excess properly, then the substance is released:
B) in the prescribed quantity
B) in the amount of ½ of the WFD
2. Complete the sentence: A potent substance weighs ________________.
3. Diphenhydramine is a substance:
A) poisonous
B) potent
B) general list
4. If the prescription states 0.05 papaverine hydrochloride per dose and you need to prepare 10 powders, then you should take the drug in the following amount:
A) 0.5
B) 0.15
B) 0.05
5. Select a match:
List of substances: Inscription on the rod:
A) Substance of a simple list 1) white inscription on a black background
B) Potent substance 2) red inscription on a white background
3) black inscription on a white background
Lead time: 1 hour
form of control – testing in a practical lesson
Topic 2.3. Production of powders with poisonous and narcotic drugs.
Tasks:
Study the topic “Manufacture of powders with poisonous and narcotic drugs”
Develop skills in making powders with sp substances. A
Develop logical thinking
The student must know:
Rules for writing prescriptions for powders with substances sp. A
Rules for storing substances sp. And working with them
Rules for introducing toxic and narcotic substances into complex powders
Rules for packaging and design of powders
The student must be able to:
Check doses of toxic and narcotic substances
Calculate quantities of medicinal substances
Select and justify the technology for manufacturing the dosage form
Prepare dosage forms for release
Fill out the written control passport
Tasks for student independent work:
Task 1. Solving problems according to individual writing
A visitor approached the pharmacy with a prescription for making powders according to the recipe:
Rp: Atropini sulfatis 0.00025
Papaverini hydrochloride 0.015
Sacchari 0.25
M.f.p.
D.t.d. No. 20
S. 1 powder 2 times a day
Determine single and daily doses of atropine sulfate (sp. A) and papaverine hydrochloride (sp. B)
If the amount of toxic substance for all doses is less than 0.05, then calculate the mass of trituration
Reduce the amount of sugar by the amount of trituration
Find the total mass of powders and weight (mass of one powder)
Select a powder manufacturing technology (determine the sequence of mixing ingredients)
Specify means of packaging and presentation of the dosage form
Fill out the front side of the written control passport
Evaluation criteria:
Calculations of quantities of substances were made correctly – 1 point
Correctly calculated mass of one powder – 1 point
Correctly chosen sequence of mixing substances – 1 point
Correctly selected packaging and design means 1 point
Correctly completed PPK – 1 point
Maximum points – 5
Lead time: 1 hour
Form of control: written (individual report, survey during a practical lesson)
Task 2. Preparing for an oral interview
Questions for preparation:
1. What drugs are included in list A?
2. What are the rules for storing list A substances?
3. What are the rules for working with list A substances?
4. What should a pharmacist do if the dose of a poisonous or narcotic substance is too high?
5. What is trituration and in what proportions is it prepared?
6. In what cases is trituration used?
8. What are the rules for introducing toxic and narcotic substances into complex powders?
9. What are the rules for registering powders containing toxic and narcotic substances?
10. How is the quality of powders assessed?
Lead time: 1 hour
form of control : oral questioning in a theoretical, practical lesson
Task 3. Preparing for testing
Sample test (choose the correct answer):
1. If the doctor has overestimated the single dose of a toxic substance and documented this excess properly, then the substance is released:
A) at the dose specified in the Global Fund as the highest single dose
B) in the amount of ½ of the WFD
B) in the prescribed quantity
2. Atropine sulfate is a substance:
A) poisonous
B) narcotic
B) general list
3. Powders containing the substance sp.A are issued for sale in the following form:
A) sealed, label “Internal”, copy of the recipe
B) “Handle with Care” label, copy of prescription, “Internal”
B) sealed, “Handle with Care” label, copy of prescription
4. When making powders, trituration is used if the substances for all doses:
A) 0.1
B) 0.04
B) 0.06
5. Complete the sentence. Trituration is a mixture of a toxic substance with ___________
6. Make a match:
Substance: Property of substance:
1) Novocaine A) poisonous
2) Promedol B) narcotic
3) Atropine sulfate B) potent
D) general list
7. To prepare 100.0 trituration ratio 1:100 you need to take:
A) 1.0 toxic substance and 99.0 milk sugar
B) 0.1 toxic substance and 99.9 milk sugar
B) 1.0 milk sugar and 99.0 toxic substance
Lead time: 1 hour
form of control : testing in a practical lesson
Topic 2.4. Production of powders with various medicines
The purpose of self-preparation: to deepen and consolidate knowledge on the production of complex powders
Tasks:
Study the topic “Manufacture of powders with difficult-to-grind, coloring, lightweight medicines”
Develop skills in making powders with substances that are difficult to grind, coloring, and lightweight
Develop logical thinking
Cultivate responsibility and attentiveness
The student must know:
Rules for storing coloring, odorous and volatile substances and working with them
Rules for introducing coloring, hard-to-grind and lightweight substances into complex powders
Rules for packaging and presentation of powders with these substances
The student must be able to:
Calculate quantities of medicinal substances
Select and justify the technology for manufacturing the dosage form depending on the properties of the medicinal substances
Prepare dosage forms for release
Fill out the written control passport
Tasks for student independent work:
Task 1. Solving problems according to individual writing
A visitor approached the pharmacy with a prescription for making powders according to the recipe:
Take: Camphor 0.05
Sugar 0.3
Mix to make a powder
Give these doses number 20
Label. 1 powder 2 times a day
Determine single and daily doses of substances SP.B (if they are present in the prescription)
Find the total mass of powders and weight (mass of one powder)
Select a powder manufacturing technology (determine the sequence of mixing ingredients)
Specify means of packaging and presentation of the dosage form
Fill out the front side of the written control passport
Evaluation criteria:
Calculations of quantities of substances were made correctly – 1 point
Correctly calculated mass of one powder – 1 point
Correctly chosen sequence of mixing substances – 1 point
Correctly selected packaging and design means 1 point
Correctly completed PPK – 1 point
Maximum points - 5
Lead time: 1 hour
Form of control: written survey during a practical lesson
Task 2. Preparing for an oral interview
Questions for preparation:
1. What substances are classified as difficult to grind and how are they stored?
2. What is the peculiarity of producing powders with difficult-to-grind substances?
3. How should dyes be stored and what is the peculiarity of making powders with them?
4. What substances are lightweight and how are they introduced into complex powders?
5. What are semi-finished powder products and what are the advantages of using them?
6. What is the difference between distribution and separation methods of dispensing powders?
7. How is the quality of prepared powders assessed?
lead time: 1 hour
form of control – oral questioning during theoretical and practical classes
Task 3. Preparing for testing
Sample test (choose the correct answer):
1. When grinding 2.0 camphor, add ethanol in the number of drops:
A) 20
B) 10
AT 5
2. All substances are weighed on special scales except :
A) riboflavin
B) furatsilin
B) diphenhydramine
D) menthol
3. Coloring drugs include:
A) aminophylline
B) phenobarbital
B) furatsilin
D) xeroform
4. Powders are packaged in parchment capsules if they contain the following substances:
A) coloring
B) odorous
B) hygroscopic
5. When making powders, grind with alcohol:
A) riboflavin 1) A, B, D
B) boric acid 2) B, C, D
C) ascorbic acid 3) B, D
D) phenyl salicylate 4) A, B, C
Running time: 1 hour
Form of control - testing in a practical lesson
4. Preparing the message"Production of powders with extracts"
Lead time: 1 hour
Form of control: oral (listening to a theoretical/practical lesson, individual interview)
Topic 2.5. General lesson “Production of powders”
The purpose of self-preparation: to generalize and consolidate knowledge and skills in the production of powders
Tasks:
Strengthen theoretical knowledge on the production of powders
Develop a sense of responsibility, understanding the importance of your profession, attentiveness, and the ability to work in a team
Develop cognitive interest, logical thinking
The student must know:
Rules for prescribing powders in recipes
Theoretical foundations of powder manufacturing
Rules for registration and release of powders
The student must be able to:
Determine the method of prescribing powders
Make calculations of the amount of medicinal substances
Select means of packaging and design of dosage forms for release
Tasks for student independent work:
Task 1. Preparing for an oral interview
Questions for preparation:
- What are powders as a dosage form?
- How are powders classified by composition, method of use, dosage?
- What are the advantages of powders as a dosage form?
- What are the disadvantages of powders as a dosage form?
- What are the requirements of the State Fund XI for powders?
- What does the distribution method of prescribing powders mean, as it is indicated in the recipe?
- What does the separation method of prescribing powders mean, as it is indicated in the recipe?
- What are the main stages of making powders?
- In what cases can substances in simple powders not be crushed?
- In what cases are medicinal substances necessarily crushed?
- What are the rules for mixing substances in powders prescribed in equal quantities?
- What are the rules for mixing substances in powders prescribed in different quantities?
- How do you dispense powders?
- What are the rules for packaging powders?
- What are the rules for preparing powders for release?
- How are lightweight coloring substances added to complex powders?
- What should a pharmacist do if the doses of substances are sp. Are A and B in powder too high?
Lead time: 2 hours
Form of control : oral questioning during a theoretical lesson
Task 2. Solving problems according to individual instructions
Recommendations for completing the task:Read the lecture text or textbook on the topic. Review the rules for prescribing powders in a prescription, checking doses, calculating quantities of medicinal substances, total mass and mass of one powder, main and additional labels used when registering powders.
Sample recipes:
Recipe 1. Rp: Acidi ascorbinici 0.15
Glucosi 0.3
M.f.p.
D.t.d. No. 20
S. 1 powder 2 times a day for a child 11 years old
Algorithm for completing the task:
Select labels for registration
Recipe 2. Rp: Dibazoli 0.03
Glucosi 0.25
M.f.p.
D.t.d. No. 20
S. 1 powder 3 times a day
Algorithm for completing the task:
Determine the single and daily dose of a potent substance (dibazole)
Draw up the front side of the written control passport according to the powder manufacturing technology
Lead time: 1 hour
Form of control : written (in a theoretical lesson)
Task 3. Preparing for testing
Sample test (choose the correct answer):
1. Based on their composition, powders are divided into:
A) simple and complex
B) internal and external
B) dosed and not dosed
2. The choice of mortar number depends on:
A) powder colors
B) prescribed dose
B) crystal structure
D) total mass of powder
3. The ability of a scale, removed from a state of equilibrium, to return after several oscillations to its original position is called a metrological property:
A) stability
B) sensitivity
B) loyalty
D) constancy of readings
4. If the doctor has exceeded the single or daily dose of a substance of list A in the prescription and formalized this excess accordingly, then the pharmacist:
A) the substance is dispensed in the dose indicated in the pharmacopoeia as the highest single dose
B) the medicinal substance is dispensed in the prescribed quantity
C) the substance is released in half the dose indicated as the highest single dose
D) sends the patient with a prescription to the attending physician
5. Narcotic substances are weighed:
A) pharmacist-analyst
B) pharmacist-technologist
B) pharmacist
6. The uniformity of powders is determined by:
A) with the naked eye
B) microscope
B) magnifying glass
7. When using the dispensing method of prescribing powders, the quantities of medicinal substances are indicated:
A) per dose and into how many parts the mass should be divided
B) for all doses and into how many doses the powder mass should be divided
C) per dose and how many such doses should be taken
8. At the beginning of each shift, scales are wiped in accordance with the order of the Ministry of Health of the Russian Federation No. 309 with the following substance:
A) alcohol-ether mixture in a ratio of 1:1
B) alcohol-water-glycerin mixture
B) 1% chloramine solution
D) ethanol solution 96%
9. The main properties of powders are:
A) fluidity
B) friability
B) flowability
10. A drug containing a substance of list A is issued for release in the following form:
A) is sealed, provided with an “internal” label, prescription number, and a copy of the recipe
B) is provided with a “handle with care” label, a prescription number, and the patient is given a signature
B) sealed and provided with a signature, a main and additional “handle with care” label, and a prescription number
D) a copy of the prescription is issued, provided with an “internal” label, prescription number, and an additional “handle with care” label
11. After grinding the pores with a mortar, the substances are mixed in the order:
A) prescribed in the recipe
B) from highest to lowest
B) from smallest to largest
12. To grind the pores of the mortar, choose the following substance:
A) written out in smaller quantities
B) written out in larger quantities
At any
13. Add: The process of uniform distribution of particles of one substance in the mass of another is called ____________
14. The choice of mortar number depends on:
A) total mass of powder
B) crystal structure
B) powder colors
15. The table of losses of medicinal substances is intended to resolve the issue of choice:
A) mortar numbers
B) the substance that wears off first
B) mixing sequences
16. When producing powders with lightweight substances, the following technique is used:
A) grind in a mortar first
B) added last
B) crushed with alcohol
D) mixed between layers of uncolored substances
lead time: 1 hour
form of control: testing in a theoretical lesson
Main literature:
1. Alekseev K.V., Suslina S.N. Pharmaceutical technology. Phoenix. 2016
2. Gavrilov A.S. Pharmaceutical technology. Manufacturing of medicines. GEOTAR-Media, 2016
3. Krasnyuk I.I., Mikhailova G.V. Pharmaceutical technology. GEOTAR-Media, 2016
Additional literature:
1. Order of the Ministry of Health of the Russian Federation No. 1175n “On approval of the procedure for prescribing and prescribing medicines, as well as forms of prescription forms for medicines, the procedure for preparing these forms, their recording and storage.”
2. Order of the Ministry of Health of the Russian Federation No. 751n
3. History of pharmacy
4. Internet sources
The text of the abstract must be printed on a computer viaone and a halfline spacingusing fontTimes New Roman, size 14.Scope of work up to20 pages of printed text. Correction of typos and graphic inaccuracies by erasing or painting with white paint is not allowed.Margins: left – 2.5 cm, right – 1.0 cm, top – 2.0 cm, bottom – 2.0 cm.
The abstract must contain:
- title page (not numbered)
- content
- introduction
- the main part of the work
- conclusion
- list of sources used
Sample title page design
Ministry of Health of the Amur Region State Autonomous Institution of the Amur Region professional educational organization Amur Medical College Specialty 02/33/01 Pharmacy Mark _______________ Date "___" ______ 20 __ ABSTRACT on Technology of production of dosage forms on the topic of: " ___________________________________" Completed: Student(s) ____ group __________________________ (Full Name) Checked: APPLICATIONS………………………………………………………………………………………… |
IntroductionIt takes 1-2 pages and introduces the problem. In the introduction it is necessary to formulate the purpose of the work. The word “INTRODUCTION” is written at the top of the sheet in the center without a dot at the end, all letters are capitalized, the font is bold.
Main part of the workcontains a full disclosure of the topic and consists of chapters, sections, subsections (if necessary). Chapters must have serial numbers indicated in Arabic numerals with a dot at the end (CHAPTER 1.).Sections should be numbered within each chapter. The section number consists of the chapter number and section number separated by a dot. At the end of the section numberthe point is put(1.1., 1.2., etc.).
Chapter headings should be written in capital letters without a period at the end, without underlining. Word hyphens are not allowed.
Distancebetween the title and the text, chapter and section headings should beone and a half interval. Each chapter begins on a new page.
Conclusioncontains conclusions reflecting the main results of the work.
List of sources usedcompiled in alphabetical order by the names of authors or titles of literature. The list must consist of at least five sources. When preparing the source data, the author's surname and initials, title of the work, place of publication, publisher, year of publication, and total number of pages are indicated.
Evaluation criteria:
- student5 points
4 points
- the student discovers mastery of the main material, experiences difficulty in identifying the main thing, when presenting the material he admits3 points
- the student has a separate understanding of the material being studied, the material is not presented correctly, not in accordance with the requirements –2 points
An electronic presentation is performed using the Power point program, the number of slides depends on the content of the material (8 - 10). The content of the presentation should briefly reflect the issues of the topic being studied that are not covered in classroom lessons, and show a visual representation of the author’s intention, as convenient as possible for perception.
Presentation outline:
- title slide
- goals and objectives of the work
- main part
- conclusions
- thanks to the audience for their attention
The title slide must indicate the name of the educational institution, specialty, title of the topic, surname and initials of the student.
Slide design requirements
Design criteria | Requirements |
Style | - maintain a consistent design style - avoid styles that will distract from the presentation itself - supporting information should not prevail over the main information (text, illustration) |
Background | Cool colors are preferred for the background |
Color | - use no more than three colors on one slide (for the background, for the title, for the text) - use contrasting colors for background and text |
Animation | - use computer animation to present information on a slide - do not overuse animation effects; they should not distract attention from the content of the information |
Contents of information | - use short sentences - minimize the number of prepositions, adverbs, adjectives - headlines should attract the attention of the audience |
Location of information | - preferably horizontal text layout - place the most important information in the center of the slide - if there is a picture on the slide, place the caption below it |
Font | - for headings – at least 24 - for text – at least 18 - do not mix different fonts in one presentation - use bold, italics or underlining to highlight information - do not overuse capital letters (they are harder to read than lowercase ones) |
Method of highlighting information | To illustrate the most important facts, use: - frames, borders, fill - shading, arrows - drawings, diagrams, tables, diagrams |
Amount of information | - you should not fill one slide with too much information (a person can remember no more than three facts, conclusions, definitions at a time) - for greater efficiency, display key points one on each separate slide |
Types of slides | To provide variety, use different types of slides (table, text, image) |
Evaluation criteria:
5 points - the student freely applies knowledge, identifies the main and minor points in the material studied,the content corresponds to the topic of the work, the information is logically and competently presented, accessible, the material is designed in accordance with the requirements
4 points – the student knows the material studied, is able to highlight the main points, presents the material competently, the presentation is designed in accordance with the requirements, but there are inaccuracies in the design
3 points – the student demonstrates mastery of the main material, but has difficulty identifying the main thing, makes mistakes when presenting the material, the material is not formatted in accordance with the requirements
2 points - the student has separate ideas about the material being studied, the material is not presented correctly, not in accordance with the requirements
An essay is a prose work of small volume (up to 5 pages) and free composition, expressing individual impressions and thoughts on the issue being studied. The essay reflects the individual experiences of the author, his view on a particular issue. It does not provide an exhaustive answer to a specific question, but reflects one’s own opinion or impression. When writing an essay, logic, the ability to argue your opinion, and competently present information develop perfectly. The presentation style is more conversational-oriented.
When preparing an essay, it is necessary to formulate a problem that is relevant in its significance and interesting to the author in content within the framework of the stated topic. Select and study information on the topic. Choose the main and the secondary. Create an outline for your essay. Laconically but succinctly reveal the content of the problem, different points of view and your approaches to solving it, without neglecting artistic expressiveness and imagery of presentation.
Writing Tips:
- When writing an essay, you should alternate short phrases with long ones. In this case, the text will be dynamic enough to be easy to read.
- You should not use complex and unclear words, especially if the meaning of the word is unfamiliar.
- Use as few general phrases as possible. The essay should be unique, individualized, reflecting the personality of the author.
- Humor must be used extremely carefully. Sarcasm and insolence can irritate the reader.
- Reflecting personal experiences, memories and impressions is a great way to confirm your point of view and convince the reader.
- It is necessary to stick to the topic and main idea, without deviating from it or describing unnecessary details.
- Having finished the essay, you should re-read it, making sure that the logic of presentation is maintained throughout the entire narrative.
- Using facts and research results in an essay is an excellent option for adding persuasiveness.
Evaluation criteria:
- studentfreely applies knowledge, does not make mistakes in the presentation of the material, highlights the main and secondary in the studied material, the material is carefully prepared in accordance with the requirements -5 points
- the student knows the studied material, is able to identify the main and secondary in the studied material, competently expresses his thoughts, the material is designed in accordance with the requirements, but not neat enough -4 points
errors, material is not prepared neatly or in accordance with the requirements –3 points
2 points
1. Carefully study the proposed topic
2. Pay attention to the questions that should be reflected in the table
3. Determine the type of table (the required number of columns and rows)
4. Title the table
5. Fill in the table cells with the necessary information
6. Make sure that the information is concise and well presented
7. Be careful when filling out the table
Criteria for evaluating work with the table
No. | Evaluation criterion | 5 points | 4 points | 3 points | 2 points |
1 | Compliance of the information presented with the given topic |
| The content corresponds to the task | The content corresponds to the task | Content does not correspond to the task |
2 | Filling volume | All cells are filled | All cells are filled | All cells are filled | There are empty cells |
3 | Conciseness and clarity of presentation of the material |
| The information is presented clearly, concisely, without unnecessary explanations | The information is presented clearly, concisely, without unnecessary explanations | The material is not presented clearly, there is unnecessary information |
4 | Literacy | The text is written correctly | There are some shortcomings and minor errors |
| There were serious errors in the text |
5 | Accuracy |
| The table is designed neatly, in accordance with the requirements | The table is designed inaccurately, in accordance with the requirements | The table is filled out carelessly, not in accordance with the requirements |
An information message is a type of independent extracurricular work by a student to prepare a small oral message for presentation at a seminar, practical/theoretical lesson. The information provided is in the nature of clarification or generalization and reflects a modern view on a particular problem. Messages supplement the issue being studied with factual or statistical materials. It is drawn up in writing and may include visual elements (illustrations, demonstration). The time limit for voicing a message is up to 5 minutes.
The message is written on one side of a sheet of white A4 paper. The text of the work is done in one of the following ways: handwritten - in dark ink or paste in legible handwriting with the height of letters and numbers at least 2.5 mm, the distance between lines is 10-12 mm; typewritten - with 1.5 line spacing on a computer, Times New Roman font, font size 14 or 12. It is recommended to align the text vertically to the width of the page. Enter individual words, formulas, symbols into typewritten work, as well as perform illustrations only in dark ink, paste or ink, and the density of the entered text should be close to the density of the main text. The message should not exceed 5 pages.
Evaluation criteria:
- studentfreely applies knowledge, does not make mistakes in the presentation of the material, highlights the main and secondary in the studied material, the material is carefully prepared in accordance with the requirements -5 points
- the student knows the studied material, is able to identify the main and secondary in the studied material, competently expresses his thoughts, the material is designed in accordance with the requirements, but not neat enough -4 points
- the student discovers mastery of the main material, experiences difficulty in identifying the main thing, when presenting the material he admitserrors, material is not prepared neatly or in accordance with the requirements –3 points
- the student has separate ideas about the material being studied, the material is not presented correctly, not in accordance with the requirements –2 points
Municipal budgetary educational institution
Secondary school No. 1
PROJECT
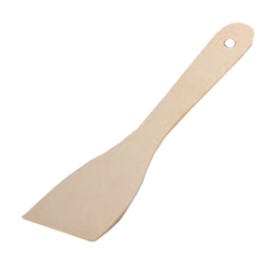
"KITCHEN SPATULA"
Shlisselburg What is a kitchen spatula used for?
Every kitchen has such a type of utensil as a kitchen spatula.
Ever since man learned to cook food in a dish, it has been impossible to do without it. It is needed for turning cutlets, stirring food in a frying pan, etc. At first it looked like an ordinary stick, but over time it took on the shape of a spatula. Where it is necessary to mix a large amount of food, the spatula is the size of a small oar, but in an ordinary kitchen it is small, no larger than a kitchen knife.
Work plan
- Problem Goals and objectives Project diagram Design specification Material selection Routing Work progress, cost calculation Environmental assessment Self-assessment of work results
Goals and objectives
Consolidate acquired knowledge, skills and abilities while studying a technology course.
Learn to independently solve technological problems, think logically, select the necessary materials and use the necessary tools.
Perform any technological operations.
Observe safety precautions.
Use drawings and tables in your work.
Find the right solutions and optimal options, as well as improve skills and abilities in the process of performing carpentry technological operations.
Project diagram
Design Specification –
list of product requirements
KITCHEN SPATULA
SELECTION OF MATERIALS
Material selection criteria

Selection of materials
Coniferous boards, unedged
Conclusion:
The most affordable, suitable and environmentally friendly material for a shovel is unedged birch board.
Routing
Technological map for product manufacturing
"Kitchen spatula"
Progress
One indicator of the value of a material is its availability. Quality parameters include the absence of cracks, rotten knots, and the absence of insect damage. It is also necessary to select wood according to the following parameters: wood color, texture, presence of beautiful healthy knots. If you have machines and hand-held power tools, it is possible to simplify wood processing operations. With the help of machines, several operations can be combined, which leads to faster wood processing.
Cost calculation table
production of kitchen spatulas
Pen

Working part

Total - 10 rubles 44 kopecks.
The cost of this product in retail sale is 60 - 80 rubles.
Conclusion: Making a blade with your own hands is profitable and economically justified
Environmental assessment
Sample
Quality assessment criterion
The goal has been achieved. The spatula is made independently, cheaper than in the store. During manufacturing, certain experience was acquired, new knowledge was obtained about the woodworking process, and new skills and abilities were acquired in this field of human activity. PRODUCT SAMPLES“Kitchen spatula”


SECONDARY VOCATIONAL EDUCATION
TOLYATTI COLLEGE OF SERVICE TECHNOLOGIES AND
ENTREPRENEURSHIP
on the implementation of practical work by students
according to the professional module
MDK 04.02 Technology of growing tree and shrub crops
MDK 04.03 Fundamentals of green building
Profession 250109 Gardening and landscape construction
Togliatti 2012
Approved by the PCC
Protocol No.___from “___”_______”2012_
Chairman of the PCC
Osipova S.A.
Developed by: Rodionova E.V., teacher
Reviewers:
Zhestkova N.M., Deputy Director for MMR, State Autonomous Educational Institution SPO TKSTP
Shubenin A.N., director of the EcoAsta garden center
Review
Performing work in the blue-collar profession: green farm worker
Rodionova Elena Valerievna
The methodological manual was developed on the basis of methodological recommendations for planning, conducting and organizing practical classes in educational institutions of secondary vocational education (letter of the Ministry of Education of Russia dated April 5, 1999 No. 16-52-58 in/16-13).
The methodological manual contains a title page, an explanatory note, the content of practical work, and a list of recommended literature. The content of practical work on each topic contains information about the students’ ideas, knowledge and skills, as well as the theoretical material necessary to complete the work.
Recommendations:Performing work in the blue-collar profession: green farm worker
Reviewer: Shubenin A.N., director
garden center "EkoAsta" ____________________________
Review
for the teaching aid “workbook”
for the implementation of practical professional module PM04 " Performing work in the blue-collar profession: green farm worker» teacher of special disciplines of State Autonomous Educational Institution SPO TKSTP
Rodionova Elena Valerievna
The methodological manual was developed on the basis of methodological recommendations for planning, conducting and organizing practical classes in educational institutions of secondary vocational education (letter of the Ministry of Education of Russia dated April 5, 1999 No. 16-52-58 in/16-13). The methodological manual contains a title page, an explanatory note, the content of practical work, and a list of recommended literature. The content of practical work on each topic contains information about the students’ ideas, knowledge and skills, as well as the theoretical material necessary to complete the work.
The methodological manual has a practical orientation and allows students to develop professional competence. Helps students develop spatial thinking and the ability to perform soil science work.
Recommendations: The methodological manual corresponds to the program of the professional module PM04 “ Performing work in the blue-collar profession: green farm worker"and is recommended for implementation in the educational process in specialty 250109 "Gardening and landscape construction" for full-time education.
Reviewer: Zhestkova N.M.,
Deputy Director for UMR of State Educational Establishment SPO TKSTP ___________________
Explanatory note
The purpose of the guidelines is to provide assistance in performing practical work provided for in the curriculum.
The main objective of practical work is to consolidate and deepen the knowledge acquired in the lessons. As a result of completing assignments, students develop professional thinking, information culture, and the ability to analyze the material received and connect it with practical activities. When performing some practical tasks, there is an element of research, which makes the work as interesting and productive as possible.
When starting practical exercises, you must remember the following principles:
It is necessary to repeat the lecture and material on the topic;
Familiarize yourself in detail with the content of the work and the methodological instructions for their implementation;
Analyze the parameters of technological calculations;
Review safety precautions when performing tasks related to mechanisms and machines.
Schemes of processes, machines, mechanisms, results of measurements, research and calculations recorded in notebooks serve as the main material for evaluating work. A progress report is prepared for each task. The text of the report is drawn up in ink, diagrams and drawings - in pencil.
Credit for practical classes is carried out when students provide completed reports.
Rules for performing practical work
Before you begin the task, read the recommendations for implementation in this manual. Read the list of recommended literature, review theoretical material related to the topic of the work.
After finishing your independent work, you must submit the result to the teacher. If you encounter any difficulties during the work, contact your teacher.
Criteria for evaluation:
You completed the task correctly. The work was done neatly - 5 (excellent).
You were unable to complete 2-3 elements. The work was done carefully - 4 (good).
The work was performed inaccurately, technologically incorrectly – 3 (satisfactory).
| Topic name | Name work | Number of hours |
| Topic 1.1 Devices and devices for growing flower and ornamental crops | P.work. No. 1 “Use of specialized equipment and tools in the cultivation of flower and ornamental crops” | 2 |
| Topic 1.3 General techniques of agricultural technology for flower crops. | Etc. work No. 2 “Carrying out pre-sowing seed treatment.” | 2 |
| Etc. work No. 3 “Carrying out vegetative division of plants” | 2 |
|
| Etc. work No. 4 “Carrying out vegetative division of plants” | 2 |
|
| Etc. work No. 5 “Carrying out vegetative cuttings of plants” | 2 |
|
| Etc. work No. 6 “Carrying out vegetative cuttings of plants” | 2 |
|
| Etc. work No. 7 “Preparing the soil for sowing plants” | 2 |
|
| Etc. work No. 8 “Preparation of soil for sowing flower seeds” | 2 |
|
| Etc. work No. 9 “Performing sowing of seeds” | 2 |
|
| Etc. work No. 10 “Performing sowing seeds” | 2 |
|
| Etc. work No. 11 “Planting of plants” | 2 |
|
| Etc. work No. 12 “Planting of plants” | 2 |
|
| Etc. work No. 13 “Caring for plant seedlings” | 2 |
|
| Etc. work No. 14 “Determining the readiness of seedlings for picking” | 2 |
|
| Etc. work No. 15 “Performing plant picking” | 2 |
|
| Etc. work No. 16 “Performing plant picking” | ||
| Etc. work No. 17 “Planting plant seedlings in open ground” | 22 |
|
| Etc. work No. 18 “Planting plant seedlings in open ground” | 2 |
|
| Etc. work No. 19 “Planting plant seedlings in containers” | 2 |
|
| Etc. work No. 20 “Compliance with the conditions for planting plants in open ground” | 2 |
|
| Etc. work No. 21 “Determining the need for transshipment of plants based on external signs” | 2 |
|
| Etc. work No. 22 “Determining the need for transshipment of plants based on external signs” | 2 |
|
| Etc. work No. 23 “Transshipment of plants” | 2 |
|
| Etc. work No. 24 “Plant transplantation” | 2 |
|
| Etc. work No. 25 “Caring for transplanted plants” | 2 |
|
| Etc. work No. 26 “Watering plants” | 2 |
|
| Etc. work No. 27 “Weeding plants” | 2 |
|
| Etc. work No. 28 “Carrying out loosening the soil” | 2 |
|
| Etc. work No. 29 “Feeding plants” | 2 |
|
| Etc. work No. 30 “Carrying out pinching of plants” | 2 |
|
| Etc. work No. 31 “Treatment of plants against diseases” | 2 |
|
| Etc. work No. 32 “Treatment of plants against pests” | 2 |
|
| Etc. work No. 33 “Formation of plants” | 2 |
|
| Topic 2.1 Devices and devices for growing trees and shrubs | Etc. work No. 34 “Use of specialized equipment and tools when growing trees and shrubs” | 2 |
| Topic 2.3 Planting woody plants and their maintenance at sites. | Etc. work No. 35 “Dividing trees and shrubs” | 2 |
| Etc. work No. 36 “Carrying out green cuttings of woody plants” | 2 |
|
| Etc. work No. 37 “Grafting of woody plants.” | 2 |
|
| Etc. work No. 38. “Carrying out pre-sowing seed treatment” | 2 |
|
| Etc. work No. 39 “Sowing seeds of woody plants” | 2 |
|
| Etc. work No. 40 “Sowing seeds of woody plants” | 2 |
|
| Etc. work No. 41 “Preparation of the seat” | 2 |
|
| Etc. work No. 42 “Planting woody plants in accordance with agrotechnical requirements” | 2 |
|
| Etc. work No. 43 “Types of fertilizers” | 2 |
|
| Etc. work No. 44 “Feeding with organic fertilizers” | 2 |
|
| Etc. work No. 45 “Feeding with mineral fertilizers” | 2 |
|
| Etc. work No. 46 “Methods of feeding trees and shrubs” | 2 |
|
| Etc. work No. 47 “Diseases, methods of protection and treatment of trees and shrubs” | 2 |
|
| Etc. work No. 48 “Carrying out treatment against diseases.” | 2 |
|
| Etc. work No. 49 “Pests, methods of protection and treatment of trees and shrubs” | 2 |
|
| Etc. work No. 50 “Carrying out treatment against pests” | 2 |
|
| Etc. work No. 51 “Giving the crown of a tree plant a given design shape.” | 2 |
|
| Etc. work No. 52 “Types of crown formation of trees and shrubs” | 2 |
|
| Etc. work No. 53 “Methods of forming the crown of trees and shrubs” | 2 |
|
| Topic 3.1 Tools and devices for garden care | Etc. work No. 54 “Use of specialized equipment and tools for garden care” | 2 |
| Topic 3.2 “Elements of improvement” | Etc. work No. 55 “Creating a flower garden on primarily landscaped and existing objects” | 2 |
| Etc. work No. 56 “Composition solutions for the design of flower beds” | 2 |
|
| Etc. work No. 57 “Working with various types of seedlings and potted crops” | 2 |
|
| Etc. work No. 58 “Methods for calculating the need for planting material” | 2 |
|
| Etc. work No. 59 “Preparation of soils for sowing herbs” | 2 |
|
| Etc. work No. 60 “Carrying out uniform sowing of grasses according to the sowing norm, caring for seedlings” | 2 |
|
| Etc. work No. 61 “Lawn repair” | 2 |
|
| Etc. work No. 62 “Assortment of climbing plants and woody vines, methods of planting and securing to a support” | 2 |
|
| Etc. work No. 63 “Determining the type of vertical gardening, planting and securing vines and climbing plants to a support” | 2 |
|
| Etc. work No. 64 “Creating hedges, caring for plants” | 2 |
|
| Etc. work No. 65 “Rules for cutting and maintaining hedges.” | 2 |
|
| Topic 3.3 Construction of garden structures | Etc. work No. 66 “Preparation of foundations for a reservoir.” | 2 |
| Etc. work No. 67 “Construction and repair of reservoirs.” | 2 |
|
| Etc. work No. 68 “Preparation of foundations for rockeries” | 2 |
|
| Etc. work No. 69 “Arrangement of rockeries.” | 2 |
|
| Etc. work No. 70 “Preparation of foundations for rock gardens.” | 2 |
|
| Etc. work No. 71 “Arrangement of rock gardens.” | 2 |
|
| Etc. work No. 72 “Care of ponds, rockeries, rock gardens.” | 2 |
Practical work No. 1
Use of specialized equipment and tools
Goal of the work
: teach how to use specialized equipment and tools for growing flower and ornamental crops.
Equipment and tools:
General information
.
Before starting work on the site, you need to draw up a detailed plan, where you should note the location of the main groups of plants that will be planted on the site, outbuildings and other buildings, fences and reservoirs. A properly developed plan will allow you to achieve good results when growing garden crops and will be indispensable when arranging and designing a garden plot.
To plan the site you will need special measuring tools.
Roulette and ruler
A tape measure is a tool with a flexible bar scale for measuring linear objects. The length of the scale can reach 100 m.

Using a tape measure, you can measure the total area of the plot, the area allocated for planting certain crops, the distance between individual beds, flower beds and other parts of the plot. It is recommended to choose the length of the tape measure based on the size of the area: for a small area a standard tape measure 10 m long will be enough, and for large areas you will need a longer tape measure.
A ruler is a necessary tool for drawing straight lines on various planes and spatial measurements.
It is convenient to use a ruler when measuring small distances, for example, between separately growing shrubs and flowers, hedge posts, beds, etc.
Level
This tool, used to measure slope, is useful when laying water and sewer lines on a site, as well as when installing a drainage system. The level is a wooden or metal block, in the middle of which there is a glass tube filled with water and hermetically sealed. Inside the tube there is a bubble, which, if there is no slope, is located in the middle. The displacement of the bubble in one direction or another indicates the direction of the slope, and its value is determined using a ruler in millimeters per 1 meter of pipe or surface length.
For grafting, pruning trees and shrubs and forming hedges, various tools are used: pruning shears, garden shears, hacksaws and others.
Secateurs are garden shears designed for trimming tree branches, thin shoots, forming and thinning the crown of garden crops.
When choosing a pruner, preference should be given to a tool with rubberized handles to protect your hands from calluses. The pruning shears should fit comfortably in your hand, and when folded, there should be no gap between the blades, otherwise the tool will crush the branches without cutting them.
By pressing firmly and sharply on the handles of the pruning shears, a clean, smooth cut is achieved without tearing the bark on the remaining part of the branch. In this case, the working blade of the tool should rest firmly against the part of the plant stem being cut off.
For cutting flowers and herbaceous perennials, it is better to use small pruning shears with thin blades.

Gardeners often use various knives, which must be well sharpened. Garden knives are suitable for trimming live and damaged, but not dead, branches.
Using grafting knives, you can graft lilacs, roses, various fruit trees and shrubs. There are three types of such knives: for grafting with cuttings (copulating) with a straight blade, for grafting rootstocks of garden plants with a bud or eye (budding) with a slightly curved blade, and combined for performing both operations.
On the back of the handles of all grafting knives there is an opener, otherwise called a pit, which is a protrusion designed to push the bark apart after the cut.
Budding knives consist of a steel blade and a smooth handle. The blade must be made of high quality steel. Such knives should be sharpened on a fine-grained whetstone, after which the blade should be brought to sharpness on a leather belt.
Every gardener needs to have at least one garden knife, regardless of the fact that pruners and hedge trimmers are used primarily when pruning branches. Using a garden knife, it is easy to smooth out burrs at the cut site, especially if the branch is thick.
Combination knives with two different blades are in greatest demand among gardeners, as they perform the functions of not only budding, but also copulating knives.
A pruning knife is one of the most common garden tools. It has no special purpose and is used for various jobs: preparing cuttings, cutting flowers.

When forming garden crops, they play a huge role scissors, which are used for haircuts, pruning non-lignified thin shoots and other work. Various scissors are used in gardening, the main features of which are convenience and good sharpening. 
The handles of the grass and flower shears with lever drive are made of glass fiber reinforced polyamide. The cutting ability of the tool is increased by the lever. At the same time, the light weight and compactness of the scissors are of no small importance, allowing you to cut plant branches in the most inaccessible places. For greater ease of use, the installation angle of the cutting part can be adjusted within 270°.
To trim the edges of the lawn, you need special edge shears with long handles, which can also be used to level the grass in height.
Lightweight small scissors are recommended for cutting cuttings, pruning shoots, and cutting stems whose thickness does not exceed 10 mm. Serrations located on the support blade of the scissors prevent smooth or wet branches from sliding along it.
In specialized stores you can purchase various garden tools. inventory, intended for tillage. It is best to choose tools that are designed to make the gardener's work as easy as possible and that can reduce the strain on the back and shoulders. The handles of shovels and other tools should be comfortable, suitable in length and thickness.
Tool handles are most often made of varnished wood, less often of durable plastic or steel pipes.
The most commonly used tool by gardeners is shovel, Made from durable stainless steel with a thin blade. Shovels are designed for digging up soil, digging holes, etc. They can also be used to perform other work, such as removing garbage. There are several types of shovels used when working in the garden.

This lightweight general purpose shovel features a durable handle and a sharpened metal blade. The handle is most often made of aluminum with a rubber coating, and the blade is made of hardened aluminum.
Folding shovels made of hardened boron steel, aluminum and plastic are very convenient and practical. Such shovels are indispensable for various works on a summer cottage and, due to their compactness, do not cause much trouble during transportation.
Using this tool you can cut off plant roots and form lawns.

Shovel
To dig up the soil, it is best to use large bayonet shovels. Thanks to the pointed shape of the blade, such shovels easily penetrate to great depths and turn over layers of soil.

Bayonet shovel

Heavy soil attachment
A shovel is good to use for preparing soil mixtures, applying organic fertilizers, or other work involving bulk solids.
Rake They are a metal attachment with teeth arranged at right angles, attached to a handle. The tool is used when cutting beds in a garden plot, removing leaves and debris, uniformly distributing fertilizers over the soil surface and other work. You can find a wide variety of rakes in specialty stores and garden centers.

Leveling the soil with a rake
Rakes with replaceable attachments of various shapes are very practical. Typically, the handle of such rakes is made of lightweight aluminum, and the attachments are made of durable plastic. The advantage of this tool is that the plastic attachments are not susceptible to rust when in contact with wet grass or soil, but the main disadvantage is that they are less durable compared to metal rakes.

Rake
Depending on the design, the purpose of the rake varies. The most common rake has 11 short, strong teeth, used for working the ground and raking up grass and leaves.
The leaf rake has 25 long, frequently spaced, springy teeth that provide efficient harvesting.
The small leaf rake has 7 long springy teeth. This tool is useful for raking leaves in hard-to-reach places, between tall plants and under bushes.
The large leaf rake has 25 curved teeth to prevent branches from getting caught in the rake. They are very convenient when working on large areas.
Pitchfork They are a steel nozzle with long, straight, sharp teeth, attached to a handle. This tool is used to loosen the soil after digging. In addition, forks are also used for other types of work, such as stacking hay or straw.
Recently, sharp and durable 4-prong telescopic garden forks have been introduced, perfect for working in areas with hard, rocky soil. The bending angle of the handle is 13°.

Pitchfork
A useful auxiliary tool when working in the garden is a shovel, which is a small shovel with a shortened handle and curved sides.

Trowel
Currently, you can buy a variety of scoops made from glass fiber reinforced polyamide in garden centers that can withstand temperatures of 40-150 °C. This tool is durable, easy to clean from dirt, the edges of the blade have a rounded shape, which reduces the likelihood of damage to plant roots. If necessary, the blade can be sharpened.
Ice rink are a tool consisting of a roller of various widths and shapes and a handle attached to it. This device is used to cultivate the soil surface. Rolling helps to increase moisture permeability and accelerates the decomposition of organic fertilizers. Smooth rollers are used to compact and level too loose soil, and ringed and ribbed rollers are used to easily mix the top layers of soil and improve its structure before sowing.
Harrows– tools used for pre-sowing tillage come in several types. Conventional harrows, which are used for harrowing, that is, loosening and mixing the top layers of soil, have two varieties - tooth and disk. In the most common tooth harrows, the elements loosening the soil are sharp teeth, while in disk harrows they are replaced by disks with a diameter of 4–5 cm.
For scouring - leveling the soil surface and crushing lumps - draggers of various designs and trains are used. These devices spray the soil less than harrows and allow you to best prepare the area for sowing.
Among gardening tools, a special place is occupied by mechanical means. Mechanisms for tillage, depending on the power of the motor and the number of functions performed, are divided into three classes: light, medium and heavy. An important characteristic of these mechanisms is also the size of the area covered and the depth of tillage.
Motor cultivators can run on gasoline or electricity. The former are safer; they can be used at a considerable distance from the garden house. Electric cultivators are more environmentally friendly, but their main disadvantage is that the length of the wire limits the possibilities of using the devices.
Light motor cultivators are relatively inexpensive, but have a short engine life and are often equipped with a small number of attachments. This class also includes motor rippers - units for hilling, weeding and loosening rows - and rotary cutters suitable for surface tillage (to a depth of 10–15 cm).
therefore, their use does not require great physical strength.

Motor cultivator
The 75 mm wide manual mini-cultivator can be used on any area of land. This tool is characterized by increased strength, does not bend when digging up excessively dry soil, and is convenient in that its use does not require gasoline or any other source of energy.
Usage walk-behind tractors significantly facilitates the gardener’s work, especially if it is necessary to cultivate large plots of land. They can be used for a range of gardening tasks: digging up the soil, loosening, hilling, killing weeds, applying fertilizers, etc. Currently, there are models on sale that perform more than 30 operations thanks to the various attachments included in the kit.

Walk-behind tractor
Laying out flower beds and creating beds on the site should be started only after large plants have been planted - fruit and berry and ornamental trees and shrubs. For this you will need rakes, forks, hoes, rippers and other tools.

Device for marking beds
Ripper, or, as gardeners often call it, a scratch rake, is used when loosening row spacing in beds with vegetable or flower crops. The tool consists of a nozzle with long sharp teeth, made of high-strength steel and a shortened wooden handle.

The order of work.
1.Study and write down basic information in your workbook O specialized equipment and tools used for growing flower and ornamental crops.
2.Draw in a notebook all types of equipment and tools used for growing flower and ornamental crops
Practical work No. 2
Carrying out pre-sowing seed treatment
Goal of the work : learn to carry out pre-sowing treatment of flower seeds.
General information .
Seeds of flower and ornamental crops vary in shape, size, color, and have different germination times. So, nasturtium and sweet pea have large seeds, while poppy and tobacco have small seeds. The germination period of annual lupine seeds is one year, and that of fragrant tobacco seeds is up to 10 years.
Ornamental flower crops propagated by seeds can be divided into two groups: those grown by sowing seeds directly into open ground and those grown by seedlings. The seedling method involves sowing seeds and growing seedlings in protected ground, followed by planting them in a permanent place in open ground after the end of the period of night frosts.
Flower crops grown by sowing in open ground include plants with a short cycle of vegetative development (mignonette, nasturtium), cold-resistant plants (marigold, matthiola), as well as plants that cannot withstand picking due to the tap root system (annual lupine , poppy).
The second group includes heat-loving plants or plants with a long growing season, which do not have enough warm days of summer for development. At the same time, using the seedling method, it is possible to achieve early flowering of crops.
Seeds intended for sowing must have high varietal and sowing qualities. Mixtures of other varieties are not allowed in varietal seeds. The sowing qualities of seeds are determined by their purity, germination energy, and germination.
The sowing quality of seeds is influenced by their storage conditions. Seeds should be stored in paper packages in a dry, ventilated room at a constant (preferably low - +5...+10 °C) temperature.
To obtain friendly shoots and healthy seedlings, the seeds are subjected to the following types of pre-sowing treatment.
Stratification consists of long-term (from 2 to 9 months for different ornamental crops) keeping seeds in a humid environment at a low temperature (+4 °C) in the presence of air. The seeds are mixed with wet sand or peat in a ratio of 1:3 and stored in the cellar or refrigerator. The natural process of seed stratification occurs when they are sown in open ground before winter.
Air heat treatment. In warm, sunny weather, the seeds are scattered in a thin layer in the sun and stirred constantly throughout the day. The germination and energy of seed germination after such treatment are significantly increased.
Scarification used for partial destruction of the shells of poorly germinating seeds with thick skins. Through the damaged shell, the soil solution penetrates more easily to the embryo, and the germination process is thereby accelerated. The following scarification technologies can be used:
– mechanical: seeds are shaken together with small pebbles;
– thermal, consisting of repeated alternation of freezing and scalding with boiling water;
– chemical, in which the seeds are left for a day in a weak (0.1%) solution of acetic or hydrochloric acid.
Soaking the seeds. Large seeds of sweet peas, nasturtium, and flowering beans are soaked in warm water for a day, after which they are dried and sown. Soaking in a solution of growth stimulants (epin, heteroauxin) also speeds up the germination process.
Seed dressing protects seedlings from fungal and bacterial infections. At home, seed disinfection is carried out in a 0.2% solution of potassium permanganate for 15 minutes or by keeping it in hot (50–60 °C) water for several minutes. After treatment, the seeds are washed in clean water, dried and immediately sown.
The order of work.
1. Study the basic information on pre-sowing seed treatment.
2. In your workbook, write down the main types of pre-sowing treatment of flower seeds.
3. Based on the studied material, in laboratory conditions, treat the seeds and flower crops given by the teacher.4 . Describe in your workbook the procedure for treating flower seeds.
Practical work No. 3-4
Carrying out vegetative division of plants
Goal of the work
: learn to carry out vegetative division of flower plants.
General information
.
Vegetative propagation Reproduction by individual vegetative organs of the mother plant is called. In addition to hybrid plants, whose offspring change their characteristics during seed propagation, vegetative propagation is used for crops that do not form seeds at all or have a long development cycle, or for crops whose cultivation from seeds is very difficult, or in cases where it is necessary in minimal timing of obtaining flowering offspring.

It's frosty and windy outside. We listen to a blizzard song and imagine winter in the image of the Snow Queen - cold floes of ice, prickly snowflakes, harsh, inaccessible, evil. And just recently the sun was shining, the snow was glistening and creaking, and winter was like the Snow Maiden girl - affectionate and friendly. Winter has many faces, mysterious, fabulous. Not a single season has left so many bright, memorable images in the folklore and literary heritage.
Preschool children love to draw with winter themes. They like to depict lacy snowflakes and patterns, trees in snowy robes, bullfinches on bright scarlet rowan clusters. Children's works reflect fairy-tale images and analogies - Santa Claus's beard is white not from gray hair, but from frost, his tears are icicles, and ordinary snowmen with carrot noses. Observing winter nature helps children free themselves from graphic cliches and encourages them to independently search for new ways of depicting. So, for example, some see winter not only in light colors: “In winter, evening comes early, we walk in the dark, so its image should have black.”
Of course, all these abilities do not come at once - their effective development is possible only under the conditions of proper pedagogical guidance, which involves the creation of emotional and evaluative attitudes towards the perception of nature, towards enriching the artistic and figurative content of classes, as well as in the presence of the necessary materials for productive creativity.
One of the effective ways to develop children in this direction is to create a didactic paper model “Winter Sorceress”.
This work contains the most interesting children's ideas for personifying winter: a hat - the night sky with falling snowflakes, a hairstyle - snow-white curls and ringlets - a symbol of frequent snowstorms, a dress - decorated with winter trees and bright-breasted bullfinches, a flowing train of a cloak buried in a snowdrift . A cheerful, good-natured snowman and snow-covered Christmas trees were also suggested by children as components of the image of this time of year.
Materials:

1. Whatman paper
2.Double-sided colored paper (blue, silver, brown, black)
3.Corrugated paper in pastel colors and bright green
4.Thick cardboard
5. PVA glue, glue gun
6.Scissors
7. Gouache, brushes, markers
8. Thin wire, wire cutters
Manufacturing:
1.Cut out a square with a side of 25 centimeters from thick cardboard. Cut a strip of whatman paper 35 centimeters high, roll it into a cone, and secure the cone with glue to a cardboard base. To give the structure stability, strengthen the hollow body with rolled newspapers.

2.Cut out the dress decoration elements from black and purple paper. Secure them around the base.
3.Arms – sleeves are made of tall, sharp cones. The base of the cone is whatman paper covered with blue paper, the decoration is a garland and snowflakes cut out in the traditional way. Attach the prepared parts to Winter’s body.

4. Trees and twigs - easy to make from paper strips with uneven cuts, using diagonal twisting with varying pressure (it is best to use special pastel or prototyping paper for this work). Attach the branches to Winter's body.

5.The technique of wrapping it in a paper napkin will help to emphasize the volume of the snowman. We glue crumpled pieces of paper onto the basic forms (three cardboard circles of various sizes), and then “wrap” the resulting blanks in a paper napkin, tucking and gluing its edges to the wrong side of the circles.

6.The image of a snowman will be complemented by a broom - made of corrugated paper, rolled into a tube and cut on one side and thin wire wrapped in brown paper.

7. Let's move on to making Christmas trees. The volume of the figure is achieved through the use of crumpled paper. The shape of the tiers is traditional. Fold the prepared circles of different sizes into 4 triangles. A necessary condition is gluing the blanks along the edge of the lateral sides of the triangles. At the same time, the tiers themselves are not pressed against the base, but only lightly touch it in several places.

8. The train - Winter's cloak can be made from thin and plastic cashew paper. Cut a square, fold it diagonally, cut out a strip with a rounded shape at the top and bottom. The width of the stripes at the center is 35 centimeters. Place deep folds on the cloak blank. Secure the cloak to the base of Winter at the back, with a slight overlap on the sleeves.
9.Cut a strip of whatman paper 15 centimeters wide and 35-40 centimeters long. Using gouache and markers, draw the “face” of Winter. Allow the workpiece to dry and roll it into a truncated cone. Glue to the body.
10.Winter curls and ringlets can be cut into a spiral from small paper circles. Carefully unroll the thin spirals and glue them to the base.

11.We begin making the hat. Cut out 2 circles with a diameter of 15 centimeters from black cardboard. In the center of one workpiece, cut a round hole with a diameter of 7 centimeters. Glue the cone to the base 7 centimeters. Connect the top and brim of the hat. Then glue the second circle on the underside of the hat. Attach it to Winter's head. When decorating a hat with lace snowflakes, use corrugated paper or napkins.

12.The completion of the composition and addition to the image of the “Winter Sorceress” will be the use of crumpled corrugated paper or napkins in white and light blue to create snow drifts and snowdrifts in the foreground and a slender, beautiful Christmas tree and flexible rowan in the background.
Usage:
The didactic manual “Winter Sorceress” is an artistic and visual generalization and personification of inanimate nature, fascinating material for the development of the intellectual abilities of children 3-4 years old. Can be used for group and individual work with children in kindergarten.
Target: Generalization and consolidation of students’ knowledge about the season - winter. Development of mental processes in children of primary preschool age.
Tasks:
Promote the development of visual, short-term and long-term memory;
Develop attention and perception;
Develop thinking by establishing connections between objects, phenomena and concepts;
Develop active speech, the ability to express your thoughts;
Develop children's sensory abilities.
Options for using the manual.

Option 1. The manual is used as part of educational activities.
Option 2. The manual is used in children’s independent activities.

A sufficiently high level of abstraction at this age is possible only under the condition of established ideas about natural phenomena, with the required number of impressions, and emotional “living” of the states of nature. Poetic images, folk proverbs, sayings, and riddles about winter help to concentrate children's attention. The didactic manual “Winter Sorceress”, thanks to the conscious choice of artistic material that is adequate to the design, will contribute to the formation of associative-figurative thinking, will help children see the variety of colors and textures of paper, and will give children the joy of communicating with a beautiful object.